Cleaning tips

Why Is My Floor Sticky After Mopping? 5 Common Mistakes & How to Fix Them

Why Is My Floor Sticky After Mopping? 5 Common Mistakes & How to Fix...

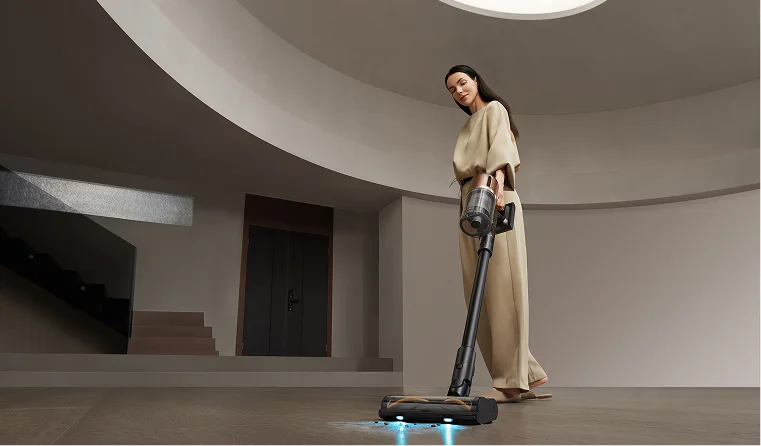
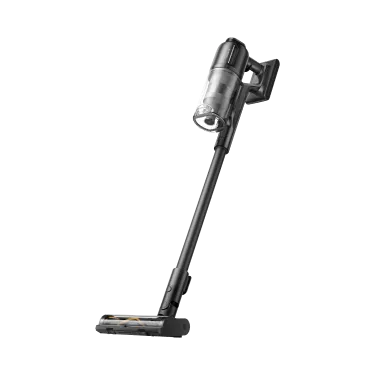
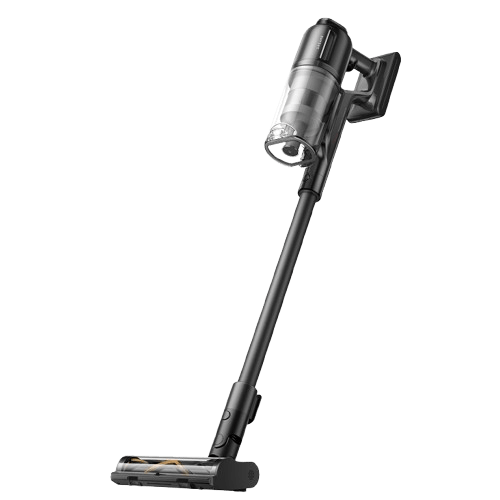
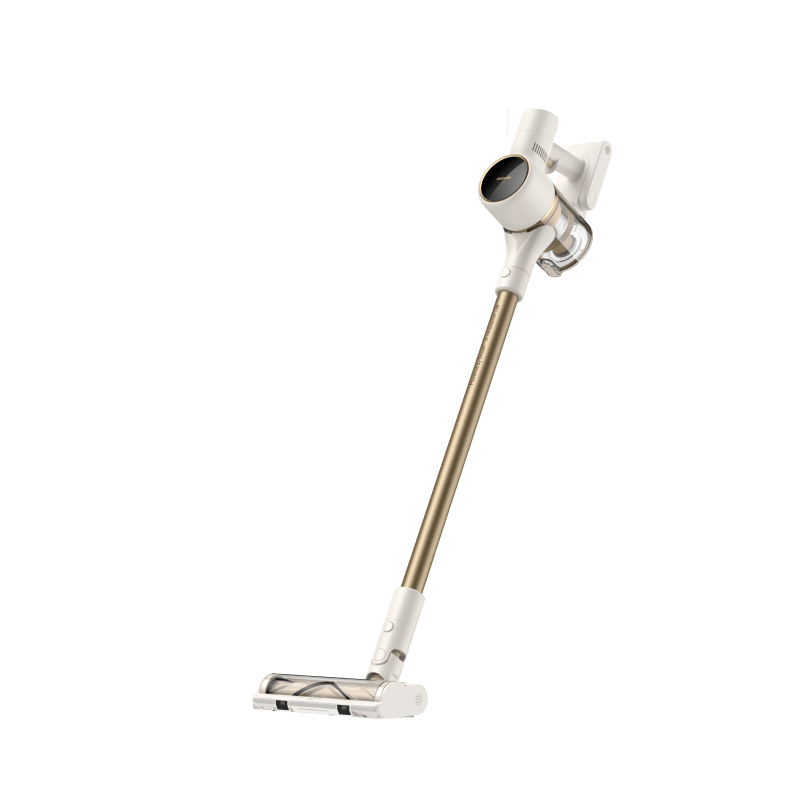
You just spent your time and energy mopping the floor, expecting a smooth, clean shine. Instead, it feels tacky and grimy under your feet. It’s confusing, especially when you followed every step you thought was right. You question yourself, why is my floor sticky after mopping with vinegar? The truth is, sticky floors aren’t caused by laziness or dirt left behind.  They happen because the cleaning process itself goes wrong in small but crucial ways. In this guide, we’ll pinpoint exactly where things go off track and show you how to clean sticky tile floors for a residue-free, professional-level clean every time. The Real Reason: Cleaner Residue on Your Floors Here’s the surprising part: it’s not the dirt you missed; it’s the invisible film left behind. Most cleaning solutions contain surfactants, ingredients that lift grease and grime. These surfactants cling to the floor if not rinsed off completely, creating a thin, sticky layer that attracts new dirt almost instantly.  Even the best cleaner can cause buildup when it’s overused or poorly rinsed. What feels like a dirty floor is often just leftover soap turning into a magnet for dust and footprints. Once you understand that, the problem becomes easy to solve: you’re not battling grime, you’re fighting residue. Pinpoint the Source of Sticky Floors / Pinpoint Your Mopping Mistake Now let’s figure out where things went wrong. These are the five most common causes of post-mop stickiness. You might recognize one or all of them in your own routine. Mistake #1: Using Too Much Cleaning Solution More soap doesn’t mean it's clean. When the cleaner concentration is too high, there isn’t enough water to rinse it away. What’s left behind dries into a slightly tacky film that grabs every speck of dust that touches it. The fix is simple: always check the dilution ratio on the bottle.  A capful in a gallon of water usually does the job. Think of cleaner as seasoning, too much ruins the recipe. If you can see suds, you’ve already gone too far. The right amount leaves the floor smooth, not slippery or sticky. Mistake #2: Using the Wrong Type of Cleaner Some products are simply wrong for the surface. Oil-based soaps or heavy all-purpose cleaners can coat hardwood and tile with residue that doesn’t rinse off easily. What you need instead is a pH-neutral cleaner designed for your specific floor type. It lifts dirt without leaving a trace once wiped away.  For sealed hardwood or laminate, choose a wood-safe, low-residue formula. For vinyl and tile, light vinegar solutions or neutral floor detergents work best. Picking the right product is half the battle in achieving a clean that actually feels clean. If you’re using a vacuum mop, don’t forget that the cleaning solution is important as well. Check out our Vacuum Cleaning Solution Guide: How to Choose, Use, and Alternatives for more info! Mistake #3: Mopping with Dirty Water Once your mop water turns cloudy, it’s not cleaning anymore; it’s spreading dirt evenly across the floor. Each dip of the mop reintroduces grime that’s already been lifted. The result is a dull, sticky finish that feels worse after every pass. Professionals solve this with a two-bucket system: one for the cleaning solution and one for rinsing out the mop.  This simple change prevents “grime redistribution.” Empty and refill your rinse water often, especially when tackling large areas. Clean water means a clean floor, not a recycled mess. Mistake #4: Skipping the Final Rinse Many people stop mopping as soon as the dirt disappears. That’s where the residue begins. The rinse step isn’t optional; it’s essential. After mopping with cleaner, go over the surface once more with clean water and a fresh mop head.  This removes leftover soap and minerals before they dry. It’s a quick extra round that makes all the difference. You’ll notice your floor feels smoother and looks clearer, without that faint film that usually returns hours later. Mistake #5: Starting with a Dirty Mop A dirty mop spreads old residue the moment it touches the floor. Dried cleaner, grease, or bacteria hiding in the fibers mix with your fresh solution and undo your work. Always start with a clean, dry mop head.  Wash microfiber pads after every use, or replace disposable ones right away. When your cleaning tool is spotless, the results finally match your effort. It’s a simple rule that professionals never skip. How to Mop for a Residue-Free Finish Now that you know the cause, here’s the solution for how to clean sticky wood floors. A clean, non-tacky floor comes down to three key habits: Use the Right Amount of the Right Cleaner: Always follow dilution instructions and choose a pH-neutral, residue-free formula suitable for your floor type. Adopt the Two-Bucket Method: Keep one bucket for your cleaning solution and another for rinsing your mop. Never dip a dirty mop into the clean mix. Finish with Fresh Water: Go over the floor once more using clean water only. It clears every trace of detergent or vinegar. For detailed techniques and floor-specific solutions, see our complete guide on How to Clean Sticky Floors. The Ultimate Fix: A Mop That Can't Make Mistakes Even with the best method, human error creeps in. That’s why new technology is built to eliminate these weak points entirely. Wondering how to clean sticky hardwood floors? Consider smarter devices!  Wet Dry Vacuums Wet-dry vacuums combine suction, scrubbing, and rinsing in one step, so the floor never sits under dirty water. Devices like the Dreame H15 Pro Heat Wet Dry Vacuum keep clean and dirty water separate, apply precise amounts of cleaning solution, and dry the floor instantly. The result is spotless, streak-free, and residue-free in a single pass. You get the cleaning power of heat without the risk of warping or damage, just spotless, smooth floors every time. Robot Vacuums and Mops If you’d rather skip mopping altogether, a robot vacuum-mop handles it on its own. The Dreame Aqua10 Ultra Roller Robot Vacuum measures out just enough solution, uses clean water for every pass, and even washes its mop pads after each run. It doesn’t forget to rinse or reuse dirty water, so the sticky floor problem just disappears. Frequently Asked Questions on Why Floors Stay Sticky Why are my floors still sticky after mopping? Most likely, there’s leftover soap or dirty water on the surface. The cleaner dried before it was fully rinsed off. What's the best way to clean sticky floors? Use warm water and a mild cleaning solution, followed by a thorough rinse to remove residue. For easier upkeep, smart cleaning tools like wet and dry vacuums or robot vacuums with mopping functions do the job automatically. Scrubbing, rinsing, and drying in one pass to leave your floors spotless without the extra effort. Why does my floor feel sticky even after using vinegar? Vinegar can help, but too much of it, or no rinse afterward, can leave a faint residue. One cup per gallon of warm water is enough. What kind of floor cleaner won't leave a sticky residue? Look for “pH-neutral” or “residue-free” on the label. You can test it by spraying a little on a mirror; if it dries clear, it’s safe for your floor.
View more
How Often to Replace a Vacuum: Lifespan, Signs, and Smarter Alternatives

How Often to Replace a Vacuum: Lifespan, Signs, and Smarter Alternatives

You're vacuuming your living room, when suddenly, you notice something strange. You pass over the same line of crumbs three times, but they’re still there. You check the filter, the brush, even the hose. Nothing’s obviously wrong, but the suction’s weak, and now the motor sounds a little off too. Is it just a clog? Do the vacuum batteries need replacing? Or is your vacuum on its last legs? Knowing when to repair or replace a vacuum can be tricky. Some problems creep up quietly, while others are impossible to ignore. The right choice often depends on your home’s size, the kind of messes you deal with, and how often you clean. This guide breaks down the most important signs that it’s time to replace your vacuum and introduces smarter, longer-lasting options that can improve your cleaning routine and your home's air quality. Let’s dive in. When to Replace a Vacuum Cleaner? Most upright and stick vacuums last about 5 to 8 years. Robot vacuums can run even longer with regular care. If your vacuum falls into that age range, start watching for red flags like weak suction or repeated clogs. As a rule of thumb: If the cost of repairs is more than half the price of a new machine, consider upgrading. If performance drops noticeably, even after cleaning filters and brushes, it’s likely time for a replacement. If your lifestyle changes, like adding pets, having children, or moving to a bigger home, you may need new vacuum features sooner than expected. Curious how long most vacuums actually last? Dreame explains it well in How Long Should a Vacuum Cleaner Last. 6 Signs You Should Get a New Vacuum You don’t need to guess. These signs tell you a vacuum has reached the end of its useful life: Loss of Suction If your vacuum takes multiple passes to pick up debris, the motor or belts may be worn out. A working vacuum should clean in one or two passes. Frequent Clogs and Blockages Occasional clogs happen, but frequent ones signal airflow problems. Quick fixes like replacing filters or belts may help, but recurring clogs often point to larger issues. Strange Noises or Odors Grinding, squealing, or burning smells are warning signs. They usually mean internal parts are failing, and continued use could damage floors or even pose a safety risk. Overheating If your vacuum shuts off or feels hot during use, the motor may be overworked. Blocked airflow or worn belts can also cause overheating, leading to permanent damage if ignored. Outdated Technology Machines older than eight years may lack HEPA filters, efficient brushes, or smart navigation. Newer vacuums clean better, save energy, and trap allergens more effectively. Housing/Flooring Changes The vacuum that worked fine in a small apartment may not keep up in a larger home. Changes in flooring or daily messes can make an upgrade worthwhile. Should You Replace Parts or the Whole Vacuum? Sometimes replacing a part adds years of use. Before discarding a vacuum, check whether a simple fix will do. Part Clean/Replace Frequency Tips HEPA Filter Clean monthly; replace every 6–12 months A dirty filter reduces suction and may release allergens back into the air. Consider upgrading to a HEPA filter if allergies are a concern. Brush Roll Remove hair monthly; replace annually Worn bristles can’t agitate carpet fibers effectively, leading to poor pickup. Belt Inspect every 6 months; replace if cracked Loose belts reduce brush speed and suction power. Battery (Robot Vac) Check after 2 years; replace if runtime drops A weak battery reduces cleaning coverage. Proper charging habits extend lifespan. Dust Bin / Bag Empty after each use; replace bag weekly or as needed Overfilled bins stress the motor and cause clogs.   For more on keeping your vacuum running, read 10 Expert Tips to Extend Your Robot Vacuum’s Lifespan. Why Change a Vacuum Cleaner if It Still Works? A vacuum may turn on but still fail at its job. Here’s why replacing it can make sense: Poor Cleaning Performance: If it takes too long or leaves debris behind, it’s time to upgrade. New Dreame vacuums with soft roller brushes clean more efficiently in fewer passes. Frequent Breakdowns or Repairs: Constant fixes get costly. Modern models use stronger parts that hold up better over time. Modern Features That Save Time: Robot vacuums map your home and empty themselves. Wet dry vacuums, like the Dreame H15 Pro Heat, vacuum and mop at once. Health Benefits: New models include sealed HEPA filtration that traps fine dust and allergens, especially helpful for households with pets or allergy concerns. Life Changes: Babies, pets, and bigger homes bring new cleaning challenges. Dreame’s robot vacuums and wet dry models adapt to daily needs and reduce manual work. Upgrade Smarter: New Vacuums That Last Longer Replacing a vacuum isn’t just about fixing an old machine. It's a chance to upgrade to smarter, more powerful tools that fit your evolving needs. Dreame’s lineup includes robot and wet dry vacuums built for long-term performance and low maintenance. Wondering if the upgrade is worth it? Take a look at Are Smart Vacuums Worth the Investment. Robot Vacuums Robot vacuums offer advanced navigation, self-emptying systems, and hands-free cleaning that adapts to any home. Whether you live in a studio or a multi-level house, there’s a match. X50 Ultra: Dreame’s top-tier robot vacuum. It features powerful suction, a soft rubber brush for precision, and a self-emptying dustbin. Ideal for homes with pets and lots of floor traffic. L50 Ultra: Known for its slim dock and multi-floor mapping, the L50 Ultra is perfect for apartments and tight spaces. It transitions easily between surfaces and stores away neatly. L40 Ultra: A versatile option with strong suction, intuitive app control, and quiet operation. It’s great for busy households that want daily, low-fuss cleaning. D20 Plus: Compact but effective, this model is perfect for smaller homes or those new to robot vacuums. It handles daily debris while remaining budget-friendly. Each robot model cuts down on manual vacuuming, mapping your space and cleaning on schedule so your floors stay spotless with minimal effort. Wet Dry Vacuums For sticky messes, spills, and deep cleaning, wet dry vacuums offer a powerful solution that goes beyond dust pickup. H15 ProHeat: A premium option with a heated brush roll that lifts dried-on spills while mopping and vacuuming in one go. It also features automatic self-cleaning and drying, reducing odor and mold risk. H14 Pro: Slightly more compact, the H14 Pro still delivers strong suction, dual water tanks, and smart dirt detection. It’s ideal for high-traffic areas and kitchens. For a broader look at the cleaning lineup, explore Dreame’s complete Vacuum & Floor Care Collection and discover models tailored to every home size and cleaning style. What to Do With Old Vacuums Before tossing your old vacuum in the trash, consider more sustainable options: Donate or Recycle: Many organizations accept working appliances for donation. Dreame’s guide on how to donate a vacuum cleaner explains where to drop off or schedule pick‑ups. Trade‑In Programs: Some retailers offer trade‑in credits when you upgrade to a new model. Check local stores or manufacturer promotions. Repair and Repurpose: If the motor works, your old vacuum could be used in a garage or workshop for sawdust and small debris. Responsible disposal reduces waste and helps others benefit from a machine you no longer need. FAQ How long should a vacuum last? Most vacuums last around 6 to 8 years, though high-quality ones can last longer with proper care. If your machine still performs well and parts are available, it may not need replacing yet. Is it cheaper to repair or replace? If repairs are minor and your vacuum is under 5 years old, fix it. But if the motor fails or repairs cost more than half the price of a new vacuum, replacement makes more sense. Which is better for pets, robot vacuum or wet dry vacuum? Use both: robot vacuums handle daily pet hair pickup effortlessly. Wet dry vacuums are better for muddy paw prints and spills. Should I replace my vacuum if it doesn’t have a HEPA filter? If allergies or pets are an issue, upgrading to HEPA filtration helps trap fine dust and allergens. If your current vacuum allows, you might only need to upgrade the filter—not the whole machine. Conclusion: When Is The Right Time to Replace Your Vacuum? Choosing when to replace a vacuum isn’t just about age. It’s about performance and lifestyle. If your machine is older than eight years, struggles with suction, or emits odd smells, it may be time for an upgrade. Replacing parts can help, but if repairs are frequent or expensive, a new vacuum is a better investment. Ready for a smarter clean? Explore Dreame’s robot and wet dry vacuums, pair with the Dreamhome app, and let your floors take care of themselves—so you don’t have to.
View more
How to Clean Your Mop Head (And Why It Might Be the Last Time You Do)

How to Clean Your Mop Head (And Why It Might Be the Last Time You Do)

A clean home starts with clean tools, but the task of cleaning your mop is often overlooked. A dirty mop head doesn’t just fail to clean, it actively redistributes soil, bacteria, and grime across your floors. This is a crucial hygienic task that cannot be ignored. Even after a machine wash, trapped lint and debris can remain, negating all your hard work. In this guide, we’ll detail the definitive methods for achieving a hygienic clean. More importantly, we will introduce the modern technology that elevates floor hygiene and solves this recurring chore for good. Best Ways to Clean a Mop Head (and Keep It Germ-Free) Cleaning a mop head is a straightforward process when you follow these essential steps. Step 1: Rinse First After every use, the first step is to rinse the mop head thoroughly under running water until the water runs clear. The goal is to mechanically purge loose dirt and grime. This action prevents the wash water from becoming immediately saturated with soil, which allows your detergent to work more effectively on embedded dirt. Step 2: Pick Your Method: Machine Wash vs. Hand Soak Machine washing is ideal for detachable cotton or microfiber heads. For sponge mops or non-detachable heads, the hand soak method is required. Machine Washing (For Cotton, Microfiber, O-Cedar, Spin Mops) Detergent: Use a small amount of mild liquid detergent for microfiber. Use heavy-duty laundry detergent for cotton; bleach can be added for deep disinfecting. Wash microfiber separately or only with other non-linting synthetics (a mesh bag is recommended). Wash cotton with other durable cleaning items like rags. Use warm or hot water on a gentle cycle for microfiber. Use hot water on a normal or heavy-duty cycle for cotton. Do not use bleach or fabric softener on microfiber (they ruin the fibers). Bleach is safe for cotton if disinfecting is needed. Hand Soak (For All Mop Types, Required for Sponge/Fixed Heads) Fill a bucket with warm water and add a suitable cleaner (a few drops of mild dish soap for sponge mops; a small amount of laundry detergent for fiber mops). Let the mop head soak for at least 10-15 minutes, then agitate it vigorously in the bucket to dislodge grime. Drain the dirty water and rinse the mop head meticulously under clean, running water until no suds remain. Step 3: Properly Dry the Mop Head Proper drying is the most critical step to prevent mildew and odors. Air Drying: This is the safest and most recommended method. Hang the mop in a well-ventilated area with the head up and fibers hanging down to allow for maximum air circulation. Sunlight is an excellent natural sanitizer. Machine Drying: Use with extreme caution. High heat can melt and destroy microfiber. If you must use a dryer for microfiber, use a low-heat or no-heat/air-dry setting ONLY. Never use dryer sheets. Don’t Turn Your Mop Into a Germ Spreader The core issue with manual mops is moisture. A damp mop that has not been properly dried before storage becomes an ideal incubator for bacteria, mold, and mildew. This microbial growth is the direct cause of musty odors and turns your cleaning tool into a contamination tool, spreading a biofilm of germs with every use. When to Replace Your Mop Head (The Mop Head Lifecycle) Even with perfect care, mop heads are consumable tools with a finite lifespan. Knowing when to replace yours is essential for maintaining a clean and hygienic home. While lifespans vary (cotton: 15-50 washes; microfiber: 200-500+ washes; sponge: 2-6 months), the condition is what matters most. Look for these definitive signs that it's time for a replacement: Persistent Odors: A musty smell that remains even after a deep, sanitizing clean. Visible Wear: Fraying strands on a string mop or a crumbling, brittle sponge. Permanent Discoloration: Deep-set stains that won't wash out indicate trapped grime. Poor Performance: The mop head no longer absorbs well, feels slimy, or leaves streaks on the floor. No More Dirty Mop Heads: Meet Robot Vacuums with Self-Cleaning Mops Imagine a system that completely automates the entire mopping process, including the cleaning of the mop itself. This technology exists in today's advanced robotic mops , which use intelligent docking stations to handle the entire cycle of washing, rinsing, and drying their own mop pads. The system uses clean water for washing and extracts the dirty water into a separate tank, ensuring the robot always cleans with a hygienic tool and eliminates cross-contamination for a consistently spotless floor. The most advanced of these systems have refined this process into a science, addressing every single pain point of manual mop care. For instance, the docking station for a device like the Dreame X50 Ultra is engineered to replace the entire manual cleaning protocol. Instead of a simple rinse, it uses Hot Water Auto-Washing at up to 176℉ (80°C), a temperature specifically chosen to dissolve the stubborn oil and grease from its mop pads that a typical washing machine cycle can leave behind. Crucially, it provides a definitive solution to the number one cause of mop odors. After the mops are washed, a Hot Air Mop Drying feature circulates heated air to ensure they are completely dry, hygienic, and ready for the next use. This single function is designed to permanently prevent the growth of mildew and the development of that musty, sour smell. Conclusion: Clean Your Mop Today, Automate it for Tomorrow A dirty mop will only push germs around your home. To ensure a hygienic clean, it's essential to follow a strict protocol: rinse after every use, wash according to the mop's material, and—most importantly—allow it to dry completely before storing it away. This diligence is the key to preventing odors and maintaining an effective cleaning tool. For those ready to eliminate this chore entirely, automated technology offers a complete solution. By investing in a system that cleans and maintains itself, you can ensure your floors are not just visibly clean, but hygienically spotless, day after day.
View more