How to Clean an Oil Spill on Your Kitchen Floor (Fast & Safe Guide)

How to Clean an Oil Spill on Your Kitchen Floor (Fast & Safe Guide)

Dreame Editorial Team |
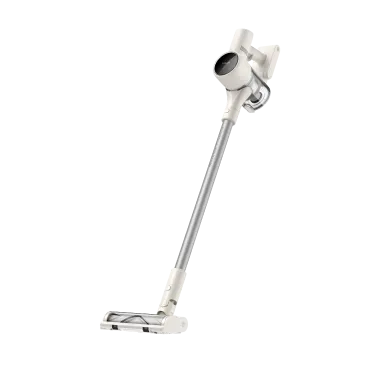
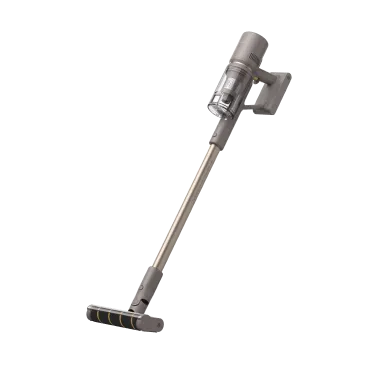
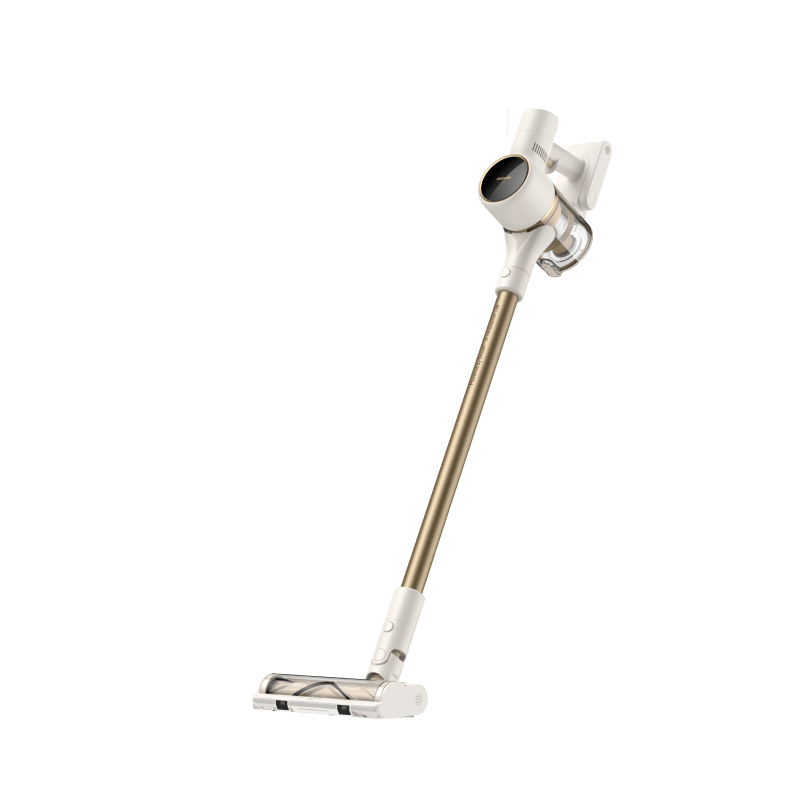
Cleaning a cooking oil spill on your kitchen floor can be tricky. Water and oil don't mix, so water-based cleaners won't do the job alone.  But no worries—there are some hacks that make it easy and quick to clean oil spilled on your kitchen floor. Types of Cooking Oil Spills You Might Face When oil hits the floor, speed matters most—but knowing what you’re dealing with can make cleanup easier. In a typical kitchen, that spill might be olive, vegetable, sunflower, coconut, peanut, or sesame oil. You might also be looking at melted butter or rendered animal fat. These behave differently: animal fats and butter are high in saturated fat, so they solidify as they cool and cling stubbornly to surfaces. Plant-based oils stay liquid at room temperature, so they’re generally easier to blot and lift. The real challenge comes from oils exposed to high heat—like deep-fryer oil—which becomes thinner and seeps into the floor more quickly, making stains harder to remove. No matter the type, though, acting fast is the single most important step for preventing long-lasting damage. First Response: What to Do Right Away Contain the spill before it spreads: Immediately use absorbents such as paper towels, corn starch or kitty litter to cover the spill and soak up as much of the oil as possible before it spreads or soaks into the floor. Allow the absorbent to sit for 10 to 15 minutes. Use a dustpan and broom or scraper to scoop up the saturated material. After removing the absorbent material, apply a fine layer of baking soda or flour to the remaining oily patch to draw out any lingering oil. Deep clean to remove residue once the oil has been absorbed. It's crucial to clean the area completely to remove any remaining substances that could make the floor a slippery hazard: Degreasers: A simple and effective degreaser can be made with a mixture of dish soap and hot water. You can use a scrub sponge to break down oil molecules. Follow up with advanced help such as the Dreame H15 Pro Wet and Dry Vacuum to lift remaining oil and sanitize with high heat. Important: Do not use water on a large, hot oil spill. This can cause the oil to splatter and create a burn hazard.  Never throw water on an oil or grease fire because it can cause an explosive reaction. If you have an oil-soaked cloth or rag, wash it separately to avoid contaminating other clothes. Why a Wet and Dry Vacuum is a Breakthrough Cleaning a cooking oil spill on the floor can be challenging, a wet dry vacuum provides a breakthrough. Unlike some appliances that might simply smear the oil around, each model in the Dreame Wet Dry Vacuum Collection uses powerful suction to lift liquid directly off a surface and then gives it a hot wash. It's a game-changer because it removes the slick, hazardous oil in one pass, leaving you with a clean, non-slip surface with less scrubbing and paper towel waste. The most effective response needs to consider not just the type of oil spilled, but also the surface it has been spilled on. Surface-Specific Advice for Spilled Oil Wood Floor Blot up the excess oil, then use a wood-safe cleaner or a baking soda and water paste. Gently scrub along the wood grain. Laminate Dab the oil with a soft cloth to prevent spreading. A mild solution of dish soap and warm water is effective for a final wipe-down. Concrete Cover the spill with an absorbent material like cat litter. After sweeping it up, use a strong degreaser or detergent with water and scrub with a stiff brush. Kitchen Tiles Absorb as much oil as possible with paper towels. Use a solution of warm water and dish soap to easily cut through and clean the remaining grease. Want to see more floor cleaning hacks? Go check our bolgs: How to clean hardwood floors How to clean wood floors How to Clean and Mop Tile Floors How to Clean Laminate Floors How to Clean Marble Floors How to Clean Grout on Tile Floor How to Clean Linoleum Floors Choosing Floor Cleaning Solution Cleaning Options to Reach For When you're faced with a greasy cooking oil spill on your kitchen floor, dish soap is a go-to for a reason: it is formulated to break down fats and oils, making it easier to rinse them away. It's gentle on most floor types and readily available, so it's a great first line of defense. Degreasers are heavy-duty cleaners specifically formulated to tackle tough grease and grime. They're more powerful than dish soap and can make quick work of a large spill, but it's wise to check if they're safe for your specific flooring material to avoid any damage. Vinegar is a popular DIY natural cleaner. Excellent for cutting through mineral deposits and disinfecting, it doesn't have the same fat-breaking power as dish soap or a degreaser. While a fantastic all-purpose cleaner for many things around the house, it's not the best choice for tackling a cooking oil spill. For that, you'll want to stick to a good dish soap or a dedicated degreaser. The best backup to finish the job is some high tech help such as the Dreame H14 Wet Dry Vacuum that can clear and sanitize the floor in a few quick passes. Smart Kitchen Habits to Reduce Spill Risk Keeping cooking oil spills from happening in the first place is all about building some smart kitchen habits. One of the easiest things you can do is to never leave a pan of hot oil unattended. A moment of distraction is all it takes for the oil to overheat and start smoking, increasing the risk of a splash or a fire. Another simple tip is to use a deep pan or pot when you're frying to contain any splatters. And when it's time to dispose of used oil, let it cool completely before carefully pouring it into a sealable container instead of down the drain—which is a whole other mess to avoid. Small changes can make a big difference in keeping your kitchen floor clean and safe. Pro-tip: Create an Emergency Spill Kit An emergency kit should include a few essentials: a bag of baking soda, cornstarch to soak up the oil; paper towels for initial blotting; degreasing dish soap for breaking down the oil and non-slip rubber gloves. Store everything in a labeled container in an cabinet so you can act quickly. FAQ Q: Can oil spills be cleaned fully?  Yes, a cooking oil spill can be fully cleaned from a kitchen floor with the right approach and a little patience. The key is to first absorb as much of the oil as possible with an absorbent material before using a degreaser or dish soap to tackle the remaining residue. Q: Which cleaner works fastest? Using an advanced appliance such as the Dreame H14 Pro Wet and Dry Vacuum is a fast and efficient way to clean up cooking oil spilled on the kitchen floor. It can suck up both the liquid oil and any absorbent material you've used in pre-treatment. Q: Can I use a robot vacuum and mop? They are no substitute for the hands-on actions described above, but some robot vacuum models can handle fresh spills that are not too greasy.   Shining and Safe A cooking oil spill might feel like a sudden disaster, but with quick action, the right materials, and the proper tools, your floor can be restored to its clean, safe, and slip-free state in no time. Dreame’s range of advanced cleaning appliances makes the process easier, delivering powerful, targeted performance to handle even stubborn messes. With the right partner in cleaning, you can keep your home looking beautiful—and safe—day after day.me.    
Continue reading
How to Clean Timber Floors: The Ultimate Guide for Sparkling Results

How to Clean Timber Floors: The Ultimate Guide for Sparkling Results

Dreame Editorial Team |
Timber floors are timeless. They’re stylish, durable, and warm underfoot, but they can also lose their charm fast if not cared for properly. From sticky spots and muddy paw prints to dull patches and water damage, we’ve all experienced the pain of cleaning timber the wrong way. In this guide, you'll learn how to clean timber floors step-by-step, discover the best supplies for each type, and uncover the cleaning mistakes that can do more harm than good. Let’s bring back that beautiful timber glow. Why Timber Deserves Special Care Timber floors are often the centerpiece of a home. They’re durable, allergy-friendly, and can last for decades when maintained properly. But unlike tile or vinyl, timber is naturally porous. That means it reacts to moisture, heat, and even cleaning chemicals. Common risks with timber flooring include: Warping or buckling from excess water Surface scratches from debris or harsh bristles Cloudy residue from the wrong cleaners Long-term damage from oil spills or glue In short? Treat it right, and timber will return the favor. What Kind of Timber Floor Do You Have? Before you start cleaning, it’s important to know your floor type. Different timber finishes have different needs. Solid Hardwood: Natural timber planks with long-term durability. Typically sealed with polyurethane. Engineered Timber: Plywood base topped with real timber. More water-resistant, but still sensitive to excess moisture. Floating Timber Floors: Installed without nails or glue. Usually click-lock planks with a timber veneer. We’ll explain how to clean each of these in detail later on. What’s Best to Clean Timber Floors With? The good news: You don’t need dozens of fancy tools. A few essentials and a solid routine are all it takes to keep timber gleaming. 1. Mop for Timber Floors Can you mop timber floors? Yes—if you do it right. Choose a flat microfiber mop that you can wring nearly dry. Avoid string mops that hold excess water. Always mop in the direction of the wood grain. Dreame Take Try the Dreame L50 Ultra robot mop for hands-free cleaning. Its smart pathing technology ensures every inch of your timber floor gets cleaned while avoiding over-wetting. Perfect for daily upkeep without lifting a finger. 2. pH-Neutral Timber Floor Cleaner Skip harsh cleaners or vinegar. Instead, use a pH-neutral cleaner designed for timber surfaces. These remove dirt without eating into the finish. 3. Vacuum for Timber Floors Vacuuming is often better than sweeping. A quality vacuum, like the Dreame X40 Ultra Robot Vacuum, removes fine dust and grit that causes scratches. Why it’s ideal for timber floors: Soft roller brushes gently lift dirt without damaging the finish Adjustable suction adapts to floor type to avoid wear Anti-tangle design reduces clogging from pet hair or long debris It vacuums and mops intelligently, saving you time and effort. How to Clean Timber Floors: Step-by-Step Guide Ready to get started? Here’s the best way to clean timber floors: Step 1: Vacuum Thoroughly Use a soft-brush vacuum head to lift dust, dirt, and crumbs. Be sure to reach under furniture and along baseboards. Pro-tip Set robot vacuums like the Dreame L50 Ultra to clean while you’re out. With quiet operation and precise room mapping, it cleans thoroughly without disrupting your routine, making it ideal for busy households or pet owners. Step 2: Mix Cleaner with Warm Water Fill a bucket with warm (not hot) water and add a small amount of pH-neutral cleaner. Follow the dilution instructions. Step 3: Mop Gently Along the Grain Dip and wring your mop until barely damp. Mop in the direction of the grain to avoid streaks. Rinse and wring often. Step 4: Spot Clean Stains Carefully For sticky spots or stains, dampen a cloth with a diluted cleaner. Gently blot (don’t scrub), and always test in a corner first. Step 5: Dry Immediately  Never leave timber damp. Dry it immediately with a microfiber cloth or dry mop. Tips for Efficient Cleaning A few smart tweaks make timber floor cleaning faster and help preserve that fresh, clean look. Here are some useful tips: Clean up spills right away, especially liquids like oil, coffee, or wine. Always vacuum before mopping to prevent debris scratching the surface. Open windows or turn on fans after mopping to speed up drying. Keep humidity levels at 40–60% to prevent gaps. Use felt pads under chairs to reduce scratching during movement. Adopt a shoes-off policy to reduce dirt and scratches. Set a robot vacuum to clean multiple times per week for maintenance. Pro-tip For deep cleaning, the Dreame H14 Pro Wet and Dry Vacuum tackles spills without overwetting. It combines powerful suction and controlled water flow to safely lift sticky messes or grime—perfect for preserving your timber floor's finish. Cleaning by Floor Type Each type of timber flooring needs slight adjustments during cleaning. Floating Timber Floors Avoid soaking the joints, as moisture can seep into the seams and warp the planks. Use a nearly dry mop and vacuum with soft rollers. A robot vacuum like the Dreame L50 Ultra is ideal thanks to its no-mop zones. It detects flooring type and avoids moisture-sensitive areas, so you get safe, daily cleaning without risking water damage. Engineered Timber Floors These are slightly more water-resistant but still sensitive to heat and chemicals. Stick with microfiber mops and pH-neutral cleaners. Avoid vinegar, as it dulls the finish. Use a wet and dry vacuum like the Dreame H14 Pro for deeper maintenance without damage. Its precise water control and reach remove hidden messes safely and efficiently. Solid Hardwood This type requires the most care. Water and steam can easily cause damage. Vacuum daily with a soft-brush head, and mop with minimal moisture. Refinish every 5–10 years, and use cleaners labeled for hardwood. For deeper advice, check our full guide: How to Clean Hardwood Floors. Common Mistakes to Avoid Even with the right tools, small mistakes can still dull or damage timber floors. Here’s a table of common pitfalls and how to avoid them: Mistake Quick Fix ❌ Using too much water ✅ Wring mops until barely damp and dry floors immediately ❌ Skipping the vacuum step ✅ Vacuum first to remove debris that can scratch ❌ Using harsh chemicals or vinegar ✅ Stick to pH-neutral timber floor cleaners ❌ Leaving wet spots to air-dry ✅ Wipe with a microfiber cloth right after mopping ❌ Scrubbing stains aggressively ✅ Blot gently with a damp cloth and test first ❌ Using steam cleaners on timber ✅ Avoid steam entirely to prevent warping Important Never steam clean timber floors, as moisture and heat can penetrate and damage the wood fibers. How to Maintain Your Timber Floor A clean timber floor is great, but long-term maintenance is even better. Here’s how to keep yours shining year-round: Vacuum regularly with a robot vacuum like the Dreame L50 Ultra. Avoid high heels or dragging furniture across the floor. Add furniture pads and rugs in high-traffic areas. Keep humidity between 40 and 60% to prevent shrinking or warping. Use doormats at entrances to reduce tracked-in grit. Dreame Take Want the best all-in-one tool? The Dreame H14 Wet and Dry Vacuum handles wet and dry messes on timber and sealed floors. Ideal for multi-surface homes, it handles sticky spills and daily dust without tool switching or extended dry time. FAQs Q: Can you mop timber floors? A: Yes, but use a microfiber mop that’s barely damp, and dry the surface immediately. Q: Can you steam clean timber floors? A: No. Steam can warp or damage timber. Stick to pH-neutral solutions and minimal moisture. Q: Can a robot vacuum and mop clean timber floors well? A: Yes, especially if you use one with mop-exclusion zones like the Dreame L50 Ultra or Dreame X40 Ultra. They’re smart enough to vacuum without over-wetting your timber. Q: What is the best way to clean timber floors? A: Vacuum regularly, mop with a damp microfiber cloth, dry quickly, and avoid harsh chemicals or excess water. Check our full guide above for a step-by-step routine. Conclusion Timber floors can last a lifetime, but only if you treat them with care. With the right vacuum, gentle cleaners, and proper technique, you’ll enjoy a cleaner, brighter, and longer-lasting finish. Dreame’s robot and wet and dry vacuums take the effort out of floor care, making it easier to protect your timber every day with smarter, safer cleaning. Explore more of our expert guides for cleaning other floor types: How to Choose a Robot Vacuum for Hardwood Floor How to Clean Laminate Floors (and Fake Wood Floors) Without Damage Choose smarter cleaning. Choose Dreame.  
Continue reading
How to Clean Bathroom and Shower Floors in 30 Minutes

How to Clean Bathroom and Shower Floors in 30 Minutes

Dreame Editorial Team |
Keeping your bathroom floor clean isn't just about appearances; it’s about safety, hygiene, and comfort. Between slippery soap scum, hair buildup, mold in grout lines, and stubborn water stains, bathroom floors face some of the toughest messes in your home. The good news? You don’t need hours to make it spotless. In this guide, you’ll learn how to clean your bathroom floor, whether it’s tile, wood, marble, or vinyl, in just 30 minutes using the right method for each surface. We’ll also walk you through what tools to use, including time-saving smart solutions like Dreame’s wet and dry vacuums and robot vacuums. What to Use to Clean Bathroom Floor The tools and products you use can make or break your results—and your back! Before you start, gather your supplies based on your floor type. These are some must-haves that will help you clean more effectively and faster: Pick Floor-Specific Cleaning Solutions Tile or Ceramic: Mild detergent or tile-safe cleaner Marble or Stone: pH-neutral cleaner (avoid vinegar or bleach) Wood or Laminate: Damp mop with wood floor cleaner Vinyl or Linoleum: All-purpose or vinyl-specific cleaner Essential Tools Wet-Dry Vacuum: Try the Dreame H14 Pro, which effortlessly vacuums, mops, and dries in one pass Mop: Microfiber for wood, sponge for tile, or a steam mop for grime Scrub Brush: For grout lines and shower floor buildup Gloves and Bucket: For safety and rinsing ⭐ Pro Tip: For daily maintenance, a robot vacuum like the Dreame X50 Ultra can keep floors hair-free between deep cleans. Check out this guide on picking the best vacuum for your cleaning needs. Step-by-Step Guide: How to Clean Bathroom and Shower Floors Cleaning your bathroom floor can be quick and thorough if you follow a smart process. Here's a simple workflow to get every type of mess handled: How to Mop Bathroom Floors Properly Clear the Space: Begin by clearing the floor of bath mats, trash cans, and personal items. Vacuum or Sweep: Get rid of dust, hair, and debris. Use a wet and dry vacuum for an all-in-one clean that saves time. Prepare Your Mop and Cleaner: Fill a bucket with warm water and add a cleaner suitable for your floor. Start from the Far Corner: Start at the farthest corner and work toward the door so you don’t step on freshly cleaned areas. Spot Clean Stains: Pause for soap scum or grime with a brush and cleaner. Rinse (If Needed): Some cleaners need rinsing to prevent residue. Make sure you check the label. How to Clean Hair off the Bathroom Floor Bathroom hair is surprisingly stubborn. It clings to corners, baseboards, and tile seams. Using a regular broom isn’t always enough, as it tends to push hair around. Here’s how to handle hair: Use a vacuum with strong suction, like the Dreame H14 Pro Wet and Dry Vacuum, to pick up long strands in corners and under sinks. For persistent clumps, wrap masking tape around your gloved hand and press it into tricky spots to pick up what’s left. Empty your vacuum regularly to maintain suction power. What Is the Best Way to a Clean Bathroom Floor? The truth is, there’s no one-size-fits-all method. The best way to clean your bathroom floor depends on the material. Each type of surface has its own sensitivities and cleaning quirks. Here’s a quick comparison: Floor Type Best Cleaning Method What to Avoid Tile Mop with mild tile cleaner; scrub grout with brush Bleach on colored grout Wood Damp microfiber mop with wood floor cleaner Excess water, steam mops Marble pH-neutral stone cleaner and soft cloth Acidic or abrasive cleaners Vinyl/Laminate Light all-purpose cleaner and sponge mop Harsh scrubbing or hot water How to Clean Wooden Bathroom Floors Wooden bathroom floors look beautiful but require extra care. Here’s how to keep your wooden bathroom floor in top shape: Vacuum with a soft-brush head to avoid scratches. Use a slightly damp microfiber mop. Stick to wood-safe cleaners, avoiding bleach or vinegar. Wipe dry immediately to prevent moisture damage. 💡 Dreame Take: If you’re pressed for time, the Dreame H14 Pro Wet and Dry Vacuum can help with precision moisture control to clean without oversaturation. How to Clean Marble Floors in Bathrooms Marble is one of the most delicate materials commonly used in bathrooms. It’s porous and stains easily. Here’s how to clean marble floors in your bathroom: Use a pH-neutral stone cleaner. Specifically look for a cleaner labeled safe for stone or marble. Avoid harsh or acidic products like vinegar or bleach, which can etch the surface. Polish gently with a soft cloth or mop, cleaning the area without soaking it. Use a microfiber cloth to buff dry, especially in high-gloss areas. Spot treat mold in grout with baking soda and water paste (not bleach!). Let it sit for a few minutes, then gently scrub and rinse. How to Clean Tile Bathroom Floors Tile is durable and one of the easiest surfaces to maintain, but it can still trap grime. Try this easy procedure: Start by vacuuming up or sweeping loose debris. Mop the surface with warm water and a tile-specific cleaner. Use a soft-bristled brush (or an old toothbrush) to scrub grout lines if they look discolored. Rinse and dry thoroughly to prevent slippery residue. This prevents any remaining cleaner from leaving a sticky or slippery residue. ⭐ Pro Tip: Learn how to tackle tough grime with our deep-cleaning guide: “How to Clean Tile Grout Like a Pro.” Tips to Keep Your Bathroom and Shower Clean The best way to reduce cleaning time is to prevent dirt from building up in the first place. A few consistent habits can keep your bathroom floor cleaner for longer and reduce the need for deep scrubbing. Here's a simple routine to follow: Daily Dry the floor after showers to prevent mold and water stains. A quick wipe with a towel or squeegee works. Pick up loose hair before it sticks or clogs the drain. A robot vacuum like the Dreame X50 Ultra can help by scheduling regular cleanups, which is especially handy if your bathroom has dry debris like hair or dust that accumulates daily. Ventilate the space by turning on a fan or cracking open a window to cut down on moisture buildup. Weekly Vacuum and mop the floor. Go for a wet and dry vacuum like the Dreame G10 Pro that can pick up debris while removing grime, saving you time and effort. Spot-clean grout lines and corners where grime builds up. Use a robot vacuum like the Dreame L50 Ultra for scheduled upkeep between deep cleans. Monthly Deep clean grout with a soft brush and floor-safe cleaner. Wash or shake out bath mats to remove trapped dirt and moisture. Clean under movable items like bins or cabinets to catch hidden debris. Stick to this routine, and your bathroom will stay fresher with far less effort. FAQs Q: How do I mop a bathroom floor? A: Use a suitable cleaner for your floor type, mop in sections toward the door, and avoid soaking the surface, especially for wood and laminate. Q: How to clean bathroom floor stains? A: Spot-treat with a tile-safe cleaning solution combined with baking soda, or use a pH-neutral cleaner on marble. For persistent stains, scrub gently with a soft brush. Q: Can I vacuum bathroom floors? A: Absolutely, especially with Dreame’s wet and dry vacuums, which handle both dry debris and wet spills. Q: How to clean a really dirty bathroom floor? A: Start with a deep vacuum. Then use a strong but floor-safe cleaner, hot water, and a stiff scrub brush, especially in corners and grout. Repeat mopping if needed. Final Thoughts Cleaning your bathroom floor doesn’t have to be a dreaded chore. With the right tools and routine, you can get it done in just 30 minutes. Knowing your floor type and how to treat it properly is the key to long-lasting cleanliness. Want to make it even easier? Explore Dreame’s floor-cleaning lineup. From powerful wet and dry vacuums to automated robot vacuums that do the dirty work for you, leaving your bathroom fresh, safe, and sparkling clean!  
Continue reading
How to Clean a Floor: Mistakes You Didn’t Know You Were Making

How to Clean a Floor: Mistakes You Didn’t Know You Were Making

Dreame Editorial Team |
Many people think cleaning their  floor just means running a mop over it, but that’s a fast track to damage, dullness, and grime buildup. Floors may look clean, but if you’re not cleaning the right way, you’re likely missing bacteria, grit, and residue that can degrade your flooring over time. This guide will walk you through how to clean floors properly, highlighting mistakes you might not even realize you’re making. Whether you have hardwood, tile, or vinyl, we’ll help you get it clean with smarter tools, easier techniques, and fewer headaches. What a Clean Floor Really Means Sure, a clean floor looks good, but real cleanliness goes deeper. A truly clean floor: Is free of fine dust, allergens, and bacteria Feels smooth underfoot, not sticky or gritty Has no lingering chemical smell Doesn’t get damaged over time due to harsh products or oversaturation If you’re aiming for just a “quick wipe,” you’re probably leaving buildup behind. And that can eventually lead to staining, dullness, or even warped floors - especially for wood and laminate. 3 Common Mistakes in Floor Cleaning 1. Ignoring Floor Type Every floor has its own requirements . What works great for tile might actually ruin hardwood. For instance: Using a steam mop on laminate or excess water on hardwood can lead to warping, bubbling, or discoloration. Stone and marble floors can also be damaged by acidic or abrasive products. To avoid costly repairs, always check manufacturer guidelines, and before buying any cleaning product or tool, check whether it’s compatible with your floor type. 💡 Dreame Take: A smart wet and dry vacuum like the Dreame H12 Dual adapts to multiple floor types, taking the guesswork out of your routine. 2. Using The Incorrect Cleaning Product Generic “floor cleaners” often do more harm than good, especially if they contain bleach or acidic chemicals. Many off-the-shelf products contain harsh chemicals that strip protective finishes, leave sticky residues, or attract more dirt over time. Instead, opt for floor-specific cleaners or homemade floor cleaner options like: A few drops of dish soap in warm water (for vinyl or tile) Castile soap and water (for sealed hardwood) pH-neutral stone cleaner (for marble) A rough scrub brush on laminate or a soaking-wet mop on hardwood can spell disaster. You could  try Dreame’s wet and dry vacuum options, like the Dreame H12 Dual, which adapts to multiple surfaces; and no harsh chemicals are needed. 3. Skipping Regular Maintenance Cleaning only when dirt is visible is like brushing your teeth only when you have a cavity. Dirt acts like sandpaper, wearing down floors over time. Regular cleaning not only keeps your home feeling fresh but also protects your floors from wear and tear. Create a floor cleaning schedule based on usage: Area Frequency High-traffic (entryways, kitchens) Daily spot clean, weekly deep clean Bedrooms & low-use areas Weekly clean Pet zones or kids' play areas Every 2–3 days 💡 Dreame Take: Make a floor cleaning schedule that works for your home and stick to it. Set reminders, or better yet, let a robot vacuum like the Dreame L10s Ultra handle it for you with automated daily cleaning routines  especially for high-traffic areas. How to Clean Floors: Material-Specific Tips Different floor materials require different tools and techniques. Here's how to clean a floor based on what it's made of without causing damage or creating extra work. Hardwood Floors Hardwood is beautiful but sensitive. To avoid warping or scratches, you’ll need to clean gently and dry quickly. Sweep or vacuum daily with a soft brush attachment. Use a bare-floor-friendly vacuum like the Dreame R20 Cordless Stick Vacuum for edge-to-edge dust removal. Mop weekly with a damp (not wet!) microfiber mop and a wood-safe cleaner. Dry immediately to prevent water damage. ⭐ Pro Tip: Avoid steam mops, because they can damage wood sealants. For more details, check out our full guide on “How to Clean Hardwood Floors.” Laminate Floors Laminate looks like wood but doesn’t handle water the same way. Keep it dry and avoid excess moisture. Vacuum or sweep 2–3 times per week. Avoid steam or wet mops, as laminate is not waterproof. Use a laminate-safe cleaning spray. Wipe dry after mopping. Learn more by reading our “How to Clean Laminate Floors” guide.  Tile Floors Durable and water-resistant, tile is one of the easiest floors to clean. Still, unsealed grout can trap grime if neglected. Sweep daily to avoid gritty buildup. Mop with warm water and mild detergent. For grout: use baking soda and water paste and a soft brush to clean tough stains. Rinse thoroughly and dry because soap residue attracts dirt. Consider using the Dreame H12 Dual Wet and Dry Vacuum. It vacuums, mops, and self-cleans with hot air in one go, making it perfect for tackling tile and grout without extra effort. Vinyl/LVP Floors Vinyl is tough and forgiving, but it still needs regular care to keep its finish looking fresh. Vacuum or dry mop regularly. Use warm water with a few drops of mild dish soap (go for vinegar-free cleaners to preserve the top layer). Avoid abrasives or wax-based products, as they create a dull film. Rinse well and dry after cleaning. Marble/Stone Floors Natural stone needs special care. Harsh chemicals or abrasives can etch or dull the surface, so keep cleaning gentle and pH-balanced. Sweep with a soft brush or microfiber. Use pH-neutral stone cleaner only. Never use vinegar, lemon, or bleach. Dry polish with a microfiber cloth. What’s the Best Way to Clean Floors? Here's a quick overview of floor types and the best cleaning methods for them: Floor Type Best Tool Best Cleaner Key Tip Hardwood Soft brush vacuum Wood-safe liquid Dry quickly after mopping Laminate Microfiber mop Laminate spray No steam or wet mops Tile Wet/dry vacuum Mild soap + water Scrub grout monthly Vinyl Robot vacuum Soap + water solution Rinse well Concrete Mop + vacuum Neutral pH solution Reseal yearly Marble Soft cloth Stone-safe spray No acid or bleach Tips for Deep Cleaning Floors Always vacuum or sweep first; never mop over dust. Mop in sections, rinsing frequently. Use flooring-specific solutions; avoid one-size-fits-all. Dry immediately after mopping wood or laminate. Don’t forget the edges and under furniture! 💡 Dreame Take: For a powerful deep clean, the Dreame H14 Wet and Dry Vacuum combines strong suction, hot water mop washing, and edge-to-edge reach—perfect for floors that need extra care. Floor Cleaning Hacks You Should Know Set your robot vacuum to auto-clean during work hours. Use doormats at all entries to reduce tracked-in dirt. Create a DIY cleaner by mixing warm water with a few drops of essential oil and dish soap. Add tennis balls to mop buckets to absorb residue. Create a floor cleaning schedule, stick it to your fridge, and follow it! FAQs Q: Can I make a homemade floor cleaner? A: Yes. Mix warm water with a few drops of dish soap. Avoid vinegar or lemon juice. Q: How often should I clean my floors? A: High-traffic areas: sweep daily, mop weekly. Low-traffic: once a week for both is enough. Q: Can I use steam mops on all floor types? A: No. Avoid steam on hardwood and laminate, as it can damage them. Q: How often should I deep-clean floors? A: Every 3–6 months, depending on traffic levels. Q: What’s the best vacuum for all floor types? A: A cordless or wet/dry vacuum like the Dreame H12 Dual works effectively on multiple surfaces. Q: Are robot vacuums good for daily cleaning? A: Yes. Models like the Dreame L10s Ultra can automatically handle daily vacuuming and mopping chores Final Thoughts Getting a clean floor isn’t about working harder; it’s about working smarter. By using the right tools, cleaners, and techniques for your floor type, you can extend the life of your floors and keep your home looking (and feeling) fresh. Remember to: ✅ Invest in a smart floor care routine✅ Use tools like Dreame’s cordless stick or wet and dry vacuums✅ Avoid cleaning shortcuts that could damage your flooring  later Because a clean floor isn’t just about looks, it’s about comfort, health, and peace of mind.
Continue reading
How to Clean Marble Floors: Essential Tips for a Gleaming Finish

How to Clean Marble Floors: Essential Tips for a Gleaming Finish

Dreame Editorial Team |
Marble floors add timeless elegance and luxury to any space. From upscale bathrooms to high-end kitchens, their glossy finish and natural veining make them a designer favorite. But maintaining that shine takes care and the right techniques. Marble may be durable, but it’s surprisingly sensitive to acidic cleaners, abrasive tools, and everyday grime. Whether you’re dealing with dullness, stains, or just everyday dust, this guide walks you through how to clean marble floors properly. We’ll cover everything from daily maintenance to deep cleaning, plus smart solutions using modern vacuum tech to help you preserve your floors for years to come. Types of Marble Surfaces: Why They Need Special Care Marble is metamorphic limestone, composed primarily of calcium carbonate. This gives it two vulnerable characteristics: Porosity: It absorbs liquids quickly. Acid sensitivity: Even weak acids like lemon juice or vinegar cause permanent etching. Marble Finish Types & Their Needs Marble comes in several finishes, and each one needs slightly different care: Finish Type Appearance Vulnerability Ideal Locations Polished Glossy, mirror-like shine Shows scratches and etches easily from acidic spills Formal living areas, lobbies, and hallways Honed Soft matte finish Hides scratches better but shows stains more easily Kitchens and bathrooms Tumbled Textured, aged look Most stain-resistant Shower floors, outdoor patios, pool decks Understanding the finish and location of your marble helps you choose the safest and most effective cleaning approach. Pro-tip Always test cleaning products on a small, hidden area first to avoid damage. How to Clean Marble Floors Routine maintenance is the best way to preserve the beauty of your marble floors. Let’s break it down into a few smart categories. Daily Maintenance Dust and debris can cause tiny scratches. Sweep or vacuum daily with a soft-bristle brush or a robot vacuum (like the Dreame X50 Ultra) in hard-floor mode to pick up dirt without damage. Wipe spills immediately, especially acidic liquids like wine, coffee, or citrus juices. For kitchens and bathrooms, a wet and dry vacuum is a safe and effective way to handle spills and splashes. Read this wet and dry vacuum buying guide on how to choose the best one. Weekly Cleaning Pre-treat stains (see stain removal section below). Use a pH-neutral cleaner or mild dish soap mixed with warm water. For effortless debris pickup, pair mopping with the Dreame H12 Dual Wet-Dry Vacuum. Its soft roller won’t scratch marble, and the self-cleaning brushroll prevents tangled hair. For a streak-free shine, dry with a microfiber cloth. Monthly Treatment Grout cleaning using a baking soda paste and a soft brush. Inspect the furniture pads and replace any worn felt protectors. Check the sealant by sprinkling water on it; if the stone darkens, then reseal it. Dreame Take The Dreame X50 Ultra Robot Vacuum is a great pick for daily marble floor cleaning. With its intelligent surface detection and mop-only mode, it gently lifts dust without streaking.   How to Clean Marble Floors Naturally Prefer a chemical-free approach? Here’s how to naturally clean marble floors without harsh ingredients: Mix a few drops of mild dish soap with warm water. Use baking soda paste for stains. Use a soft microfiber mop dampened (not soaked!) in the solution. Rinse with clean water and dry with a towel to avoid water spots. Important Avoid vinegar, lemon, ammonia, or any acidic cleaners, because they can etch and dull marble surfaces. How to Clean Grout in Marble Floors Grout can trap grime and mildew and affect the overall look of your floor. Here’s how to refresh it: Use a soft toothbrush or grout brush. Apply a paste of baking soda and water, let it sit for 5–10 minutes, and gently scrub. Rinse with a damp mop and dry the area thoroughly. For larger areas, the Dreame H12 Dual Wet and Dry Vacuum has edge-cleaning capabilities perfect for targeting grout lines and corners. It saves time and reduces the need for harsh scrubbing. How to Remove Stains from Marble Floors Stains can set quickly on marble, especially in bathrooms or kitchens. Here’s how to treat them: Type of Stain Solution Water stains Buff gently with a dry microfiber cloth. Use a pH-neutral marble cleaner if needed. Pet stains (like urine) Clean immediately. Use a damp cloth with mild soap. Avoid ammonia-based products. Oil-based stains Sprinkle cornstarch or baking soda, let it sit overnight, and vacuum. Organic stains (like coffee or wine) Use a poultice paste (baking soda + water) and cover with plastic wrap. Leave for 24 hours. Pro-tip Always do a spot test before applying any solution over a large area. How to Clean a Marble Shower Floor Marble shower floors are exposed to constant moisture, so they need extra care. Here’s how to best clean them: Use a non-slip brush or mop with a pH-neutral cleaner. Rinse thoroughly and dry the area to prevent soap scum or mildew. Keep good airflow in the bathroom with fans or dehumidifiers. What’s the Best Cleaner for Marble Floors? The best marble floor cleaners are pH-neutral, non-abrasive, and made specifically for natural stone. Look for labels that mention: “Safe for marble” “pH-neutral” “No acids or ammonia” You can also use robot mops like the Dreame X50 Ultra, which supports water-only mopping or gentle cleaning solution use. It keeps your floors sparkling without leaving streaks or residues. Check out this “Vacuum Cleaning Solution” article on how to choose the right solution for your floor. Another great option is Dreame’s L10s Ultra Robot Vacuum, which allows auto-mopping with precision control to avoid over-wetting. For households with kids or pets, choosing natural or eco-friendly options can be a safer and healthier choice. How to Deep Clean Marble Floors Even with regular maintenance, marble needs deep cleaning every few weeks or after high traffic. Step-by-Step Deep Cleaning: Vacuum thoroughly using a soft roller head or robot vacuum. Damp mop with a diluted pH-neutral marble cleaner. For stubborn grime, use the Dreame H12 Dual Wet and Dry Vacuum. Its intelligent water control adjusts to marble surfaces without oversaturation. Dry thoroughly. Use a wet and dry vacuum or set up airflow with a fan to prevent water marks. Important In kitchens and bathrooms, always keep marble dry to avoid mildew or water stains. Use mats or rugs near sinks and showers. Marble Floor Cleaning Tips Keep your floors gleaming with these smart habits: Use entry mats to reduce tracked-in dirt. Avoid dragging furniture. Use felt pads under furniture to prevent scratches. Enable scheduling on your Dreame robot vacuum for daily dust control to prevent buildup. Dry spills quickly, especially in kitchens or on marble shower floors. Rotate rugs and mats to prevent uneven wear or discoloration. Use slippers indoors to minimize grit from shoes. Polish every few months using a marble-safe polish to restore shine. Seal marble annually to protect against stains. FAQs How often should I clean marble floors? Dry mop or vacuum weekly. Deep clean monthly or as needed. Can I use vinegar to clean marble floors? No. Vinegar is acidic and can damage marble. Always use pH-neutral cleaners. What’s the best way to clean marble shower floors? Use a non-slip brush and a marble-safe cleaner. Rinse well and dry to avoid soap scum. Are steam mops safe for marble? It’s best to avoid them. The high heat can damage the sealant and lead to dull spots. What if my marble floor has etching? Etching needs professional polishing. Avoid acidic products to prevent further damage. How often should I seal marble floors? Every 6–12 months, depending on traffic. Are robot mops safe for marble? Yes, if they use water-only or marble-safe solutions (like Dreame’s L10s Ultra). Final Thoughts Keeping marble floors clean doesn’t have to be complicated. With the right tools and routines, you can protect your investment and enjoy their stunning finish for years to come. For daily dust, let the Dreame X50 Ultra Robot Vacuum handle the work. For deeper cleaning and grout care, the H12 Dual Wet and Dry Vacuum is your go-to. With Dreame, cleaning floors isn’t just made easier; it’s made smarter. Need help? Explore Dreame’s marble-friendly cleaning tech for effortless maintenance. Master the Art of Floor Care How to clean hardwood floors How to clean wood floors How to Clean and Mop Tile Floors How to Clean Laminate Floors How to Clean Grout on Tile Floor How to Clean Linoleum Floors Choosing Floor Cleaning Solution
Continue reading
How to Clean Floor Tile Grout Like a Pro: 5 Expert Tips

How to Clean Floor Tile Grout Like a Pro: 5 Expert Tips

Dreame Editorial Team |
It can be annoying: The grout between tiles on your floor remains dingy no matter how hard and often you scrub. In fact, the more you polish, the more the shiny tiles seem to highlight the grimy grout. It’s not a sign of poor cleaning. The solution to cleaning tile grout really boils down to a little bit of chemistry, often using just safe household items. But before you get down to more scrubbing you should understand the type of grout you’re dealing with: 1. Types of Grout: Know What You're Cleaning Sanded grout is often used for wide grout lines. The sand provides bulk, making it ideal for ceramic, porcelain and natural stone tiles where a rustic look or larger joint is desired. Unsanded grout is used for thinner joints or highly polished tiles. Epoxy grout fights stains, chemicals and moisture, making it an excellent choice for busy areas, bathrooms and shower floors. Understanding your grout is the first step toward understanding the solution, whether it is bathroom floor tiles or a kitchen floor. For sanded grout, a paste made of baking soda and water helps deep clean. For tougher stains, consider a hydrogen peroxide and baking soda paste. For unsanded grout, diluted white vinegar can clean and sanitize. Steam cleaning is also a great chemical-free option. For epoxy grout, simple warm water with a few drops of dish soap is usually enough for routine cleaning. For any remaining haze or stubborn post-installation residue, a specialized epoxy grout cleaner might be the answer. Of course you need to be armed with the right tools and cleaners. Most are readily available in your home. You can round out the list in a DYI store or online: 2. Must-Have Grout Cleaning Supplies and Tools Item Description Grout cleaner For tough stains and deeply embedded dirt Grout brush Stiff, narrow bristles to scrub grime Bucket For cleaning solutions and rinse water Microfiber cloth or sponge Highly absorbent for wiping and drying Rubber gloves Protect your hands from solutions and dirt Wet dry vacuum Hot water cleaning and extraction Homemade grout cleaner can include vinegar, baking soda or hydrogen peroxide to provide safe, chemical-free cleaning. Pro-tip A big help is a wet dry vacuum that can break apart stubborn stains, then rinse and dry afterward. The Dreame H15 Pro Heat Wet Dry Vacuum gives tiles wash at 185°F (85°C), then sucks up the loosened dirt, debris and stains. Now it’s time to get down to the nitty-gritty. A little more prep and you’re ready to go! 3. How to Clean Grout in Floor Tiles Bathroom and kitchen grout can differ because of their varied requirements. Epoxy grout is often used in the bathroom due to its water resistance, while the kitchen might have sanded grout because of the larger gaps between tiles used to give a certain look.  Depending on the type and size of the room, steam cleaning could be the preferred solution. Hand cleaning techniques use chemical-free household ingredients while an advanced wet-dry vacuum aids in both preparation and finishing the process. Here is a step-by-step guide to how to clean grout between tiles. Prepare the surface: Use a wet dry vacuum to remove loose dirt and debris. Make a baking soda paste: Mix baking soda with a little warm water to create a thick paste.   Apply the baking soda paste: Using your finger or a spoon, apply the baking soda paste directly onto the grout lines. Prepare the vinegar solution: In a spray bottle, mix equal parts white vinegar and warm water. Spray the vinegar: Spray the vinegar solution directly onto the baking soda paste on the grout. You'll notice a fizzing reaction. Let it sit: Allow the mixture to sit on the grout for up to 20 minutes. Scrub the grout: Using a stiff-bristled brush, scrub the grout lines in a circular motion. Some people use an old toothbrush while others buy a purpose-made brush.Once the brush is in hand, apply firm pressure to work the paste into the grout and loosen embedded dirt. For stubborn stains, you might need to apply more elbow grease. Note: Some users have found that the Dreame H15 Pro Heat Wet Dry Vacuum alone was effective at cleaning the grout and removing grout haze without scrubbing. Once the grout is clean you want to keep it that way. A sealant will help prevent grimy buildup. Quick Guide to Cleaning Tile Grout Method Best for Pros Cons Baking soda + vinegar paste Cement-based grout Inexpensive, natural Requires scrubbing Steam cleaning Epoxy or sensitive grout Chemical-free, less manual Need equipment Wet dry vacuum All floor grout Hot water deep clean, dries fast More costly upfront 4. Why You Need to Seal Grout You need to seal grout to protect it from stains, moisture and future discoloration. Without a sealant, grout absorbs water and dirt easily, leading to mold, mildew, and stubborn stains over time. After the hard work of getting those grout lines back shiny as new, it is a good idea to apply some sealant. How often it’s applied and the type of sealant can vary according the room’s use. Main bathrooms, kitchen floors, entryways and high-moisture areas such as showers should be sealed more often. Recommendations range from every six months to one year. Low-traffic areas like guest bathrooms and laundry rooms might only need sealing every one to two years or even longer. Different sealants for different floors The primary sealant types are penetrating sealers and membrane-forming sealers. Penetrating sealers, also known as impregnators, are highly recommended because s they absorb into cement-based grout, forming an invisible, breathable barrier that repels water and stains without changing the grout's appearance. Membrane-forming or topical sealers for high-moisture areas create a surface coating that can give a specific finish. For most common cement-based grouts in wet environments, a penetrating sealer provides the best protection. Now establish a routine that stops daily buildup. 5. Prevent Buildup on Grout To prevent future grout discoloration and haze, robot vacuum and mop combinations such as the Dreame L40 Ultra Robot Vacuum are excellent for maintaining tile floors, keeping them dust- and spill-free with minimal effort. These ingenious devices first vacuum up loose dirt then seamlessly transition to mopping using water and often a cleaning solution. This dual functionality ensures complete cleaning, preventing daily buildup of grime in busy areas like kitchens and bathrooms. Many models feature smart mapping and navigation, allowing them to efficiently cover entire rooms, avoid obstacles, and even return to a self-emptying and self-cleaning base, providing a truly hands-off approach to consistent floor hygiene and pristine lines of grout between tiles in the kitchen and bathroom. A routine of using a wet dry vacuum to keep surfaces clean is also recommended to deter dirt from settling in the grout between tiles. You are certainly not alone if you have trouble cleaning the grout between tiles on your floor. It's a challenge in almost every home. Frequently asked questions include:  F.A.Q What is the best way to clean grout on tile floors? The best way to clean grout on tile floors is to use a stiff brush with the right cleaning solution such as a paste of baking soda or hydrogen peroxide. For an effective and chemical-free deep clean, a wet dry vacuum cleaner is highly recommended because it uses hot water to loosen embedded dirt and grime. How often should I clean my tile grout? You should deep clean your tile grout at least once a year. However, in high-traffic areas, kitchens and bathrooms, more frequent deep cleaning might be necessary, perhaps two or more times a year. How do professionals clean tile grout? Professionals clean tile grout by first applying specialized pre-treatment solutions to loosen embedded dirt and grime. They then use equipment such as high-pressure hot water extractors or rotary scrubbing machines with specialized brushes to thoroughly clean and rinse the grout lines, often following up with a sealant to protect the newly cleaned surface. How much does grout cleaning cost? The cost of professional grout cleaning typically ranges from $0.50 to $3.50 per square foot, though many companies have a minimum charge, often between $100 and $200. Factors influencing the final price include the total area to be cleaned, the condition of the grout, the type of tile, and whether additional services like sealing or repair are included. Maintaining the look your tile floor had when new is not a mission impossible. Empowered with more knowledge, a little kitchen chemistry and high-tech help from modern appliances, your floors can again be gleaming—just like when first installed.
Continue reading