



Latest insights

Pain while vacuuming: What to do & how to avoid

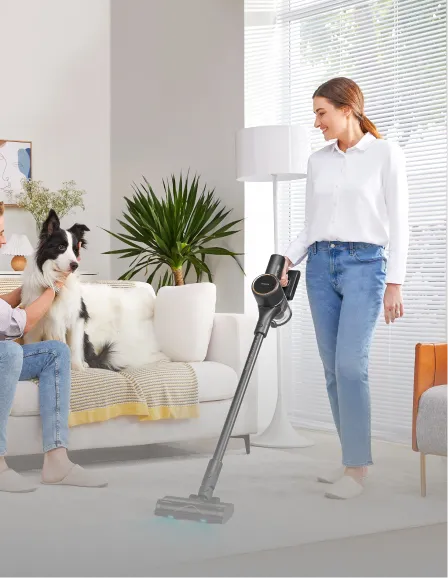
Vacuuming is a regular chore in most households. While it helps in maintaining cleanliness, it can sometimes lead to discomfort or even pain in various parts of the body. This article will explore common issues like hip pain, lower back pain, shoulder pain, and hand pain associated with vacuuming. We'll also discuss how to avoid these pains and share some surprising benefits, like the number of calories burned during vacuuming. By understanding both the risks and rewards of this household task, you can make informed choices that benefit both your health and home. Disclaimer: The information in this article is for general informational purposes only and does not constitute medical advice. If you experience persistent or severe pain, consult a licensed medical professional or physical therapist for diagnosis and treatment. Always follow your healthcare provider’s guidance before starting any new exercises or treatments. Can Vacuuming Cause Pain? Vacuuming might seem like a simple task, but repetitive motions, improper posture, or the use of outdated equipment can lead to physical discomfort or pain. The act of pushing and pulling a vacuum cleaner can involve an unexpected amount of physical exertion, especially if done frequently or for prolonged periods. Let's break down the common areas of pain and their causes, providing insights into why these issues occur and how they can be prevented. Hip Pain After Vacuuming Hip pain may occur due to prolonged bending or twisting motions. When you vacuum, you might unknowingly place stress on your hip joints, especially if your vacuum cleaner is heavy or hard to maneuver. This stress can be exacerbated by awkward angles or attempting to reach under furniture without properly adjusting your stance. Over time, these repeated movements can strain the muscles and ligaments around your hips, leading to soreness or even more serious injuries. Ensuring that your vacuum cleaner is easy to maneuver and taking care to maintain a natural range of motion can help mitigate these risks. How to relieve hip pain: Use ice or heat: In the first 48 hours, apply ice for 10 - 15 minutes. On the first day, do this every hour. On the second day, do it every 3 - 4 hours. This helps to reduce swelling. If you feel you can and know how: Try stretching your hip flexors and glutes. For example, do the figure - four stretch to relieve tightness. Also, do some light exercises to strengthen your hips, like bridges or clamshells. Elevation: If you can, raise your hips and lower body higher than your heart. Use pillows, blankets or cushions to support your leg. Avoid further strain: Switch to a vacuum with a swivel head and long handle to reduce bending. Lower Back Pain While Vacuuming Lower back pain is often due to poor posture or repetitive bending. The back muscles can be strained if you're not using your knees to bend or if you're using a vacuum cleaner with a short handle. Vacuuming with a hunched posture can compress your vertebrae and put pressure on your lower back, resulting in discomfort or pain. Additionally, frequent bending without support can weaken your core muscles, leading to further strain. To prevent this, you should stretch before and after cleaning. While vacuuming, it's crucial to engage your core and maintain a neutral spine, using your legs to support your movements rather than relying solely on your back. How to relieve lower back pain: Use gentle lower back stretches like knee-to-chest or cat-cow poses. You can also apply ice first for inflammation, then heat to relax tight muscles. Shoulder Pain After Vacuuming This type of pain is usually related to overreaching or lifting the vacuum cleaner. It can also be caused by the repetitive motion of moving the vacuum back and forth. This repetitive strain can lead to inflammation in the shoulder joints or even cause tendonitis over time. Ensuring that the vacuum cleaner's handle is at a comfortable height can help reduce the need to overreach, thus minimizing the risk of shoulder pain. Moreover, alternating arms and varying your grip can distribute the workload more evenly across your body. How to relieve shoulder pain: Stretch gently, do pendulum swings and cross-body shoulder stretches to restore mobility. If the pain doesn't go away, put ice packs on for 15–20 minutes several times a day to reduce swelling. Muscle Pain in Hand with Vacuuming Holding the vacuum cleaner's handle tightly for extended periods can lead to muscle fatigue in the hand and wrist. This can result in cramping or even conditions like carpal tunnel syndrome if left unaddressed. The pressure exerted by gripping the handle tightly can strain the tendons in your hand, leading to discomfort or pain. To avoid this, consider using a vacuum cleaner with a padded, ergonomic handle that fits comfortably in your hand. Additionally, taking short breaks to stretch your fingers and wrists can help reduce muscle fatigue. How to relieve hand pain: Shake and stretch: Stretch fingers and wrists, and do wrist rolls or thumb stretches regularly. Soak in warm water: A 10-minute hand soak can help relax stiff muscles. Massage gently: Light massage can reduce tension and improve circulation. How to Avoid Pain While Vacuuming Fortunately, there are steps you can take to prevent these types of pain. By adopting a few simple strategies, you can transform vacuuming from a potential source of discomfort into a routine that is both effective and pain-free. 1. Choose the Right Vacuum Cleaner Modern technology has made vacuuming easier with lightweight, ergonomic designs. Investing in a vacuum cleaner that suits your needs and is easy to handle can make a significant difference. Look for models that have: adjustable handles; lightweight structures (for example, lightweight cordless models); lie-flat design. These features can help accommodate different heights and reduce the physical effort required to maneuver the vacuum. Additionally, vacuum cleaners with swivel steering can enhance maneuverability, allowing you to navigate around furniture with ease and minimizing the need for excessive twisting or bending. If you're willing to look beyond handheld vacuums, you might want to consider robotic vacuum cleaners as an alternative to manual cleaning. Otherwise, keep reading! 2. Maintain Proper Posture and Use Efficient Vacuuming Techniques While vacuuming, you can try following these simple tips to further reduce the risk of injury: Keep your back straight and use your legs to move, rather than bending your back. Hold the vacuum handle at a comfortable height to avoid straining your shoulders. Engage your core muscles as you move. This can provide additional support and help distribute the workload across your body. Use your body weight to move your vacuum cleaner forward and backward instead of pushing it with your arms. This reduces strain on your arms and shoulders. Shift your weight from one foot to the other to create a more fluid motion that decreases the need for arm exertion. Practice mindful movements, such as bending at the knees and pivoting your whole body instead of twisting your spine. Consider practicing posture exercises outside of your cleaning routine to strengthen muscles and improve your overall posture. Use a consistent pace and rhythm can help prevent overexertion. Incorporating these techniques into your routine can make vacuuming less taxing and more enjoyable. 3. Take Regular Breaks Avoid vacuuming the entire house in one go. Take breaks to stretch and relax your muscles, reducing the risk of strain. Short, frequent breaks allow your muscles to recover and can prevent fatigue from setting in. During these breaks, engage in stretches that target the areas most affected by vacuuming, such as your back, shoulders, and hands. By listening to your body's signals and taking time to rest when needed, you can maintain a healthy balance and ensure a pain-free cleaning experience. How Many Calories Does Vacuuming Burn? Vacuuming isn't just about cleaning; it's also a form of physical activity. On average, vacuuming can burn between 150 and 200 calories per hour. This calorie burn can vary depending on your weight and the intensity of the activity. For those seeking to integrate more physical activity into their daily routine, vacuuming offers a practical way to stay active while accomplishing household tasks. It's a great way to incorporate some exercise into your daily routine while keeping your home clean. The act of moving and engaging different muscle groups can contribute to overall fitness, providing a dual benefit of maintaining both a clean environment and a healthier lifestyle. Embracing Technology for Easier Vacuuming The advent of smart cleaning technology has revolutionized how we approach household chores. Robotic vacuum cleaners have become increasingly popular for their convenience and efficiency. These devices offer a hands-free cleaning solution, allowing you to focus on other activities while ensuring your floors remain spotless. They can navigate around your home, cleaning floors while you focus on other tasks or simply relax. This technological advancement not only reduces the physical demands of vacuuming but also enhances the overall cleaning experience. Benefits of Robotic Vacuum Cleaners Time-Saving: With a robotic vacuum, you don't have to spend time manually cleaning your floors. This frees up valuable time that can be spent on more enjoyable activities or other household responsibilities. Reduced Physical Strain: These devices handle the heavy lifting, minimizing your risk of pain or injury. By automating the cleaning process, robotic vacuums eliminate the need for repetitive motions and awkward postures. Smart Navigation: Many models come equipped with sensors and mapping technology to clean your home efficiently. This ensures thorough coverage and prevents the vacuum from missing spots or getting stuck. Additionally, some models can be controlled via smartphone apps, allowing you to schedule cleaning sessions and adjust settings remotely. Discover additional pros and cons of robot vacuums in our guide.  Make Vacuuming a Pain-Free Experience Pain while vacuuming is not inevitable. By choosing the right equipment, maintaining proper posture, and embracing new technology, you can minimize discomfort and enjoy a cleaner home without the hassle. These proactive steps not only prevent pain but also enhance the efficiency and effectiveness of your cleaning routine. For those considering an upgrade, exploring the latest in vacuum technology can provide a cleaner home and a more pleasant cleaning experience. Embrace these innovations to make vacuuming a task you no longer dread, but rather one that contributes positively to your well-being. By transforming vacuuming into an opportunity for wellness, you can maintain a healthy living space and lifestyle simultaneously.
Read full article: Pain while vacuuming: What to do & how to avoid

Tricky Spots For Vacuuming: Are There Any?

Keeping your home clean is tough enough without those elusive pockets of dust that seem immune to your best vacuuming efforts. We all know the ones. The corners, edges, under furniture, stairs, and carpets. But fear not, technology is here to help. With the advent of smart home cleaning technology, vacuuming these hard-to-reach areas has become less of a chore. Here at Dreame, we believe there are no more tricky spots for vacuuming. This article will walk you through the what these spots once have been, the tech that tackles them, and practical vacuuming tips to clean smarter, not harder. What Are the Usual Hard-to-Reach Areas When Vacuuming? Pinpointing those challenging areas is the initial step towards effective cleaning. These spots often go unnoticed to the untrained eye. Dust and debris tend to gather in these overlooked places, affecting the overall cleanliness of your home. Recognizing where they are is crucial. Common tricky spots for vacuuming include: Corners and edges, where floor meets the wall. Under heavy or low-set furniture. Stairs and around their railings. Above door frames and window sills. Behind radiators or appliances. Ceiling edges. Carpets. Pro tip: Dust and allergens often gather where airflow is low and static builds up, so don’t assume a clean-looking floor means a clean home. Awareness of these areas helps you create a targeted cleaning plan, as some spots need specific tools and methods. Why Regular and Thorough Vacuuming Matters for Health and Well-being In our fast-paced lives, maintaining a clean home is more than just about appearance, it's crucial for our health: Vacuuming is essential for allergen control: Dust mites, pet dander, and pollen are common allergens found in homes across the US and Canada. According to a recent study, regular vacuuming can significantly decrease the presence of these irritants. This helps those with allergies or asthma breathe easier at home. It improves indoor air quality: Vacuuming regularly enhances indoor air quality by removing dirt and fine dust particles that can become airborne. Having a vacuum with a HEPA filter is crucial for cleaner air, which helps lessen respiratory problems and enhances overall health. It prevents growth of bacteria and germs: Carpets and rugs can harbor bacteria and germs if not cleaned frequently. Regular vacuuming (particularly with a HEPA filter) can remove these bacteria, reducing the risk of illnesses. It even enhances mental health: A clean home environment contributes positively to mental health. Vacuuming as part of a cleaning routine can alleviate stress by creating a tidy and organized space. Studies indicate that 87% of people living in clean homes "feel their best, both mentally and physically". Incorporating regular and meticulous vacuuming into your cleaning routine is not just beneficial but necessary for maintaining a healthy living space. By doing so, you're contributing to a healthier, happier home. Smart Tech Makes Tricky Spots Less Tricky Smart technology revolutionizes how we clean our homes. Advanced vacuums now feature intelligent sensors and software, they are less “pull and push” and more "tap and go". These upgrades deliver a more efficient cleaning process. They analyze surfaces and adjust suction power accordingly. This technology conserves energy, focusing power where needed most. Moreover, smart vacuums can navigate complex floor layouts. Integration with smart home systems further enhances convenience. You can control vacuums through voice commands or mobile apps. Ultimately, smart technology eliminates guesswork, reducing effort while maximizing cleanliness. It's a game-changer in maintaining tidy living spaces. Robotic Vacuums Are Your Ally for Hard-to-Reach Areas Robot vacuum cleaners are a boon for tackling tricky spots. For tighter layouts, a mini robot vacuum for small spaces can reach under furniture more easily and clean corners more effectively. With edge-detection abilities, they ensure no dust is left behind. User convenience stands out in robotic vacuums. You can set schedules and let these smart assistants run independently. Many models boast mapping technology. This feature enables them to learn your home's layout, enhancing efficiency. Additionally, some models feature retractable legs, allowing them to navigate over obstacles and clean areas where vacuums usually struggle. Another great innovation is detangle brushes, designed to prevent hair from getting caught, simplifying vacuum maintenance. Finally, their ability to recharge independently adds to their appeal, providing continuous service with minimal intervention. Are Cordless Vacuums Convenient to Use in Tight Spaces? In tight spaces, agility is crucial. Cordless models allow swift maneuvering in cramped or cluttered rooms without restrictions. They remove the hassle of tangled cords and limited reach. These vacuums are typically lightweight (you can find models under 4-5 lbs), making them easy to carry and handle. This feature is especially beneficial for multi-level homes and staircases. Battery life plays a significant role. Newer models boast impressive runtimes up to 60-90 minutes, allowing completion of cleaning tasks without frequent recharging. Most importantly, these vacuum cleaners include essential attachments, such as a combination tool or a motorized mini brush. They can be effortlessly converted into handheld vacuums, allowing them to clean beyond just floors. Dreame take: Dreame’s cordless stick vacuums like the R10 or Z30 offer all of the above, and some even auto-boost power on carpets or in dusty zones. 5 Key Features of Vacuums for Tricky Spots Modern vacuums boast specialized features for tricky spots. These innovations ensure efficient cleaning in challenging areas. The features to look for in a vacuum include: Edge-optimized design: Square-ish fronts or corner-reaching brushes. Low-profile: Fits under low-clearance furniture. Extendable Hoses / Specialized Attachments, for those considering stick vacuums: Crevice Tool: Ideal for corners and baseboards. Upholstery Brush: Perfect for fabric surfaces and stairs. Pet Hair Tool: Designed for removing stubborn pet fur. Adjustable suction settings: Improve cleaning efficiency by optimizing power for various surfaces and debris types. Smart Mapping or Memory, for those considering robotic vacuums: Lets robots learn where trouble zones live to clean them for you. Incorporating these elements into your vacuum simplifies tackling hard-to-reach spaces. They contribute significantly to maintaining a clean home. Step-by-Step Guide to Effectively Vacuum Tricky Spots A methodical approach will simplify the vacuuming process for you. Pre-clear clutter. This step helps your vacuum to actually reach the floor. Dust before vacuuming, especially high surfaces with lots of particles. Using a dusting brush can help dislodge dirt that might settle in edges or corners. Prep your vacuum with specialized tools. Pay attention to the order of your cleaning. Start from the top and work your way down. Vacuum slowly. Especially along edges or over high-traffic zones. Check your results, are there any spots that remain untouched? Finally, finish by emptying the vacuum's dustbin, and checking the filter. Regular maintenance ensures optimal suction and performance. With these strategies in place, cleaning challenging areas becomes straightforward! Tip: Based on your home size, a robot vacuum can greatly cut down on how much time and effort you spend cleaning. Future-Forward: Where Vacuum Tech is Going The future of smart cleaning technology is promising and exciting. The cleaning world is moving toward autonomous precision.  You can expect upcoming innovations to include AI-driven vacuums that learn your home’s layout. These vacuums adapt over time, optimizing cleaning efficiency. The integration with smart home systems will deepen - this means more intuitive control and personalized cleaning schedules for you. Nevertheless, in 2025, be it a robotic vacuum smoothly moving around your dining chairs or a stick vacuum gliding effortlessly beneath your couch, dealing with those difficult spots is no longer be a problem. Want a deeper clean without the guesswork? Explore Dreame’s smart cleaning lineup, designed to make every dusty corner feel like a clean slate.
Read full article: Tricky Spots For Vacuuming: Are There Any?

How to Clean Laminate Floors: Best Methods, Cleaners, and Tools (2026)

Laminate floors can be hard to clean properly if you've never looked into their upkeep. They look like hardwood, so you'd expect to clean them like hardwood. However, the wear layer protecting the printed wood appearance underneath doesn't handle moisture, heat, or acidic cleaners the way real wood or tile does. If you clean laminate floors the wrong way, you might see warped edges, streaks that won't lift, or worse, permanent dull patches. This guide covers the 5-step method that keeps laminate looking new and how to pick the right cleaner. We also cover which mops and vacuums work better on this flooring and the tools that have replaced the old bucket-and-mop routine for most laminate homes. A Quick Overview on How to Clean Laminate Floors Laminate is moisture-sensitive, so you'll need to remember to use less water and apply the right cleaning agents to prevent damage to your flooring. Below is a quick summary of how to clean laminate floors: Vacuum or dry sweep first to remove grit before any wet cleaning Spray pH-neutral cleaner onto a microfiber pad, never directly on the floor Mop in straight lines along the length of the planks Dry immediately with a clean microfiber cloth Skip steam mops, vinegar, oil soaps, and any method that leaves standing water 5 Steps to Clean Laminate Floors The routine below works for cleaning your laminate floors daily and weekly. It takes about 15 to 20 minutes for an average room and protects the wear layer if you stay consistent with it. Step 1: Vacuum or dry sweep first If you skip dry sweeping or vacuuming first, the mop drags grit across the laminate floor surface. Grits such as hair, sand, pet kibble or crumbs act like sandpaper when a wet pad moves over it. Taking a few minutes with a soft-roller vacuum or a microfiber dust mop before any wet cleaning is the single easiest way to protect your floors long-term. You'll want to look for vacuums with a soft brush roll designed for hard floors for this step. Stiff bristle-only brushes can leave faint scratch lines over time, especially in high-traffic spots near doors and the kitchen. Step 2: Spray cleaner on the pad, not the floor This is the step most people get wrong, and it can cause the most damage. Spraying cleaner directly on the laminate surface creates pooled liquid that seeps through the seams, which can lead to permanent warping. Spray onto your microfiber pad instead before applying it to your flooring. This way, you also get to control exactly how much moisture touches the floor. Pro-tip: Pooled liquid is the top cause of laminate edge warping. A warped plank can't be fixed without replacing it. Step 3: Mop in straight lines along the plank grain Cleaning in a back-and-forth motion across the plank pushes dirt into seam gaps. You'll want to go along the lengths instead to lift the dirt out, and you'll get a cleaner finish with fewer streak lines when light hits the floor at certain angles. Step 4: Dry immediately Even a lightly damp pad leaves behind enough moisture to cause streaks or seep into seams if you leave it. Follow each section with a dry microfiber cloth in the same direction you just mopped, and the floor dries clean. Step 5: Spot-check and address stains Once the cleaning is done, crouch down and look across the floor with light behind you. Missed spots and streaks show up clearly at that angle. You can use a slightly damp pad with a pH-neutral solution to remove ink, scuff marks, or sticky residue. Don't use abrasive sponges or magic erasers. While they might look gentle, they can strip the wear layer in patches. How to Choose a Cleaner for Laminate Floors You need a pH-neutral cleaner. The wear layer on laminate is only designed to tolerate products in the 6 to 8 pH range. Most common household cleaners sit well outside that, and the damage they cause is slow enough that you won't notice until the floor already looks dull. What pH-neutral means, and why it matters The pH scale runs from 0 (acidic) to 14 (alkaline), with 7 being neutral. Laminate's wear layer holds up fine between 6 and 8. Outside that range, your cleaner is slowly breaking down the protective coating with every use. Most all-purpose cleaners are nowhere near that range. They are mostly formulated for tile, granite, or countertops, and are not suitable for laminate flooring. Make sure to check the label before you use anything on laminate, even if the cleaning product is marketed specifically for hard floors. Ingredients to avoid These ingredients show up in cleaners that people use all the time, and each causes a specific type of damage: Vinegar is mildly acidic. One or two uses won't ruin your floor, but if you use it regularly, it can dull the wear layer permanently. Oil-based soaps leave a residue that traps dirt and builds into a hazy film. Once it's on laminate, it's hard to get off without damaging the surface. Ammonia strips the protective coating and breaks down the sealant between seams. It's the main ingredient in most glass and all-purpose cleaners. Wax-based products are designed for traditional hardwood, not laminate. They build up unevenly and leave a streaky finish after you clean. Bleach discolors the photo layer underneath the wear coating. Even diluted, it's too harsh for regular use. The DIY cleaner that works for routine cleaning A simple home mix handles most regular cleaning without any of the above issues: 1 gallon of warm (not hot) water A few drops of mild dish soap (the kind labeled gentle or free and clear) Stir gently and use it on your microfiber pad following the 5-step method. Plain warm water on a pad is often enough on its own for light cleaning. If you'd rather use a commercial product, look for one labeled specifically "laminate floor cleaner" with a pH of 6 to 8 on the safety data sheet. The label should also state it leaves no residue. Best Mops for Laminate Floors A microfiber spray mop keeps moisture controlled and lifts dirt off the laminate flooring. If you choose the wrong mop, it dumps water on the floor and leaves it pooling. The four types of mops for laminate Mop Type How It Works Best For Laminate? Microfiber spray mop Built-in cleaner reservoir, fine spray, flat pad Yes, the traditional gold standard Steam mop Heats water into steam, distributes through pad No, heat and moisture warp the laminate surface Wet/dry vacuum mop Dispenses controlled water and immediately suctions it back Yes, the modern alternative Electric spin mop Motorized rotating pads, manual water control Sometimes, depends on water control Table 1: Best Mop Types for Laminate Floors and Which Mops to Avoid Why wet/dry vacuums are the modern solution for laminate floors Traditional wet mops were designed for tile and sealed hardwood floors that tolerate water, but laminate floors are not designed for water tolerance over time. In contrast, a wet/dry vacuum such as the Dreame H15 Pro Heat dispenses controlled water and suctions it back up in the same pass, so moisture never pools on the surface or seeps into the seams. The single-roller design also means you're not dragging dirty water around the way a traditional flat mop does after the first few passes. You get the cleaning benefit of wet mopping with the moisture-protection benefit of dry vacuuming. [product handle="h15-pro-heat-wet-dry-vacuum" rating="4.7"] The Dreame H14 Pro provides the same controlled-water approach, with fewer top-end features, but available at a lower price. This model is a suitable option for laminate-only homes that do not need carpet handling. Dreame Take: Traditional wet mops leave too much water on laminate, which can cause warping over time. Our wet dry vacuums use just the right amount of water and immediately suction it up, so your floors get clean without staying wet. This is the optimal care for laminate floors. Best Vacuums for Laminate Floors Grit causes the most long-term wear on laminate. As such, having a good vacuum to remove the grit before it starts to scratch the laminate floor surface is another way you can preserve your floors longer. You'll want to look for a vacuum with a soft brush roll, strong-enough suction to lift fine dust without scratching, and a design that does not leave scuff marks from rough edges or hard wheels. Best Cordless Stick Vacuums for Laminate Floors Cordless stick vacuums are the most convenient and efficient for a daily-use pick. They handle quick passes between mop sessions without needing a full cleaning routine each time. Some of the best cordless stick vacuums for laminate floors include the following: Dreame Z30 is a premium cordless stick vacuum that delivers 310 AW of suction. It runs for up to 90 minutes on a full charge, and captures fine dust through the HEPA 14 filtration. If you have laminate floors and pets, you'll find that the included pet deshedding tool makes a noticeable difference during shedding seasons. Dreame Z20 is a mid-range option that still gets the job done well. It offers 250 AW of suction and pairs with an optional auto-empty station that handles the bin between cleans. It doesn't include the pet deshedding tool, but can cover laminate-heavy homes well without flagship pricing. Smaller homes that only need routine dust pickups will find the Dreame R10 a handy, entry-level option. It works well with laminate dust pickup, but it may not be the right choice if you have heavy shedders or a large floor area to cover. Best Robot Vacuums for Laminate Floors For homeowners who want to skip the hassle of pulling out a cordless stick vacuum every other day, you can consider using a robot vacuum to handle the daily grit removal automatically. On laminate flooring, that consistency is what protects the wear layer over time. If you're looking for a premium robot vacuum to automatically clean a laminate-heavy home, you can consider the Dreame L60 Pro Ultra. At the time of writing, Vacuum Wars ranked it the second best robot vacuum in 2026, after the Dreame X60 Max Ultra Complete. The L60 Pro Ultra navigates your house with Smart Liftable LiDAR, which means it raises in open areas for precise 360° mapping and lowers automatically to glide under low furniture. This translates to more efficient cleaning paths and fewer missed spots. The Dreame L50 Ultra is a great pick as well for laminate floors. It features a HyperStream™ Detangling DuoBrush, which handles human hair up to 30cm in length without tangling, eliminating the need to cut hair from brushes. This matters greatly on laminate where long hair tends to wrap around standard brush rolls and drag across the wear layer. The Dreame L40 Ultra Gen 2 is a solid mid-range pick for mixed-flooring homes where laminate is the main surface. It pairs 25,000 Pa Vormax suction with a 0.41-inch mop lift for carpet cleaning, so the carpet stays dry while the rest of the floor gets cleaned. The all-in-one PowerDock empties the dustbin and self-cleans the mop between runs. If your home mixes laminate with a few carpeted rooms, this guide on how robot vacuums clean carpets breaks down what to expect and how performance depends on the carpet pile and the vacuum's suction. Best Wet/Dry Vacuums for Laminate The Dreame H15 Pro Heat is also a lead pick here. It replaces both your daily vacuum and your traditional mop in a single tool, which makes it the most efficient setup for homes where laminate is the dominant flooring. The Dreame H14 Pro covers the same ground at a lower price point if the H15 Pro Heat is more than you need. [product handle="h15-pro-heat-wet-dry-vacuum" rating="4.7"] Check out Dreame's wet dry vacuum collection to decide which model is best for your routine cleaning needs. Can You Use a Steam Mop on Laminate Floors? Steam mops are not suitable for laminate floors. They combine the two things laminate handles worst: heat and moisture. Steam penetrates the seams between planks faster than liquid water does, and once it reaches the fiberboard core underneath the wear layer, the planks swell and lift. That damage is permanent and can't be reversed without replacing the affected planks. Important: Most laminate manufacturer warranties are voided by steam mop use. Even if your laminate is labeled water-resistant, steam is a different test entirely. Check your manufacturer's care guide before using any steam-based product on your floor. You might notice that some newer sealed laminates claim steam tolerance, but the risk of damage and the replacement costs are probably not worth it. If the seal weakens or the steam setting is too high, you're looking at the same permanent swelling. You can opt for microfiber spray mops which handle the same dirt without putting your floor at risk. If you want a deeper clean without the warping risk that steam brings, the Dreame H15 Pro Heat dispenses water in controlled volumes and suctions it back immediately, so moisture never sits long enough to reach the seams. It's tough on messes yet gentle enough to protect your laminate floors. How to Clean Very Dirty Laminate Floors The method for a deep clean on laminate is the same 5-step routine, but you'll have to apply the routine more carefully and with slightly more cleaning solution. You'll still need to be careful with the moisture control and pH rules so that you don't damage the floor. Here's how you can work through heavily dirty laminate floors: Vacuum thoroughly first, and don't rush it. Heavy soil usually means heavy grit underneath. If you skip this and go straight to mopping, you'll scratch the floor during the clean. You may need to run the vacuum twice, including along the edges where dirt tends to collect. Use a slightly stronger pH-neutral solution than usual. You'll still want to avoid vinegar, ammonia, and oil soaps. Since you're dealing with more dirt, you'll need to increase the dish soap in your DIY mix to about 1 tablespoon per gallon of warm water and use a fresh microfiber pad. Work in sections and don't let the solution sit. The cleaning agent can leave streaks if it dries before you wipe it. To avoid streaking, you should apply the solution to one section, wipe it down, and move to the next before going back. Rinse with clean water on a fresh pad after the first pass. This step removes the residue that the cleaning solution loosened. Otherwise, your floor will look hazy once it dries, even if it felt clean during mopping. Dry each section immediately. A dry microfiber cloth or your wet/dry vacuum's drying mode finishes the job and prevents moisture from sitting in the seams. Let's say you're working on specific stains on your laminate floors. You may find the tips below helpful without damaging the wear layer: Ink responds well to rubbing alcohol dabbed on a microfiber cloth. Lift the stain rather than scrubbing it, or you'll spread it further. Grease comes up with a pH-neutral degreaser diluted in water, applied to the pad and wiped immediately. However, remember that you can't let the degreaser dwell on the surface. Scuff marks usually rub out with the flatter side of a tennis ball. It sounds odd, but it works without touching the wear layer. Sticky residue like gum or candy hardens with a few minutes of ice on top, then lifts cleanly with a plastic scraper. You should never use a metal scraper on laminate due to the scratching risks. How to Clean Fake Wood / Faux Wood Floors "Fake wood" and "faux wood" usually mean laminate, but they can also describe luxury vinyl plank (LVP) or engineered hardwood. The cleaning method depends on which one you have since each one behaves differently when it gets wet. Here's how you can tell them apart: Laminate has a fiberboard core with a photo image of wood covered by a clear wear layer. It might sound slightly hollow when you tap it. You can also look at the cut edges; you'll see a brown fiberboard core rather than actual wood. Luxury vinyl plank (LVP) is fully synthetic and feels slightly softer underfoot. The edges are usually gray or black rather than brown, and the planks are more flexible than laminate. Engineered hardwood has a real wood veneer over a plywood core. If you look at the edges, you'll see distinct wood grain layers rather than a uniform core material. The 5-step method covered earlier is what you need for laminate floors. If you have LVP, the cleaning approach is similar but your floor tolerates slightly more moisture and is less sensitive to pH swings. Products designed for sealed hardwood apply if you have engineered hardwood; these floors tolerate higher moisture levels and oil-based soaps that would damage the laminate's wear layer. When you're not sure what you have, treat it as laminate. The laminate method is the most conservative of the three and won't cause damage to LVP or engineered hardwood if you apply it to either one by mistake. 7 Mistakes to Avoid When Cleaning Laminate Floors Most laminate damage builds slowly and stays invisible until it's too late to reverse. By the time you notice the wear layer dulling or the edges lifting, the damage has already been happening for months. Below are the common mistakes that homeowners with laminate floors may not initially know. 1. Spraying cleaner directly on the floor If you've been spraying cleaner straight onto your laminate, you're not alone. It's the most natural thing to do. The problem is that pooled liquid seeps into the seams between planks and warps the edges from underneath, and that kind of damage shows up long after the habit started. Instead, you should spray the cleaner onto your microfiber pad to get the same clean result without putting the floor at risk. 2. Using vinegar as a regular cleaner Vinegar is one of those cleaning tips that gets passed around a lot, and it's not completely wrong. A light use here and there won't ruin your floor. However, if you use it regularly over months, the mild acidity slowly dulls the wear layer. You should always use a pH-neutral cleaner for the same streak-free finish without that trade-off. 3. Applying oil-based soaps Oil-based soaps feel like a natural choice for wood-look floors, but they leave behind a residue that traps dirt and builds into a hazy film over time. Once that film settles into laminate, it's hard to remove without damaging the surface underneath. 4. Using a steam mop without checking first If you already own a steam mop, check your laminate manufacturer's care guide before you use it on your floors. Heat and moisture together are the hardest combination for laminate to handle, and most manufacturer warranties are voided by steam use, even on floors labeled water-resistant. 5. Leaving water on the surface for too long Spills happen, and laminate can handle a quick one as long as you wipe it up promptly. If you leave moisture for longer than 10 to 15 minutes, that's enough time for the moisture to seep into the seams. Keeping a dry microfiber cloth nearby makes it easy to deal with spills before they become a problem. 6. Using abrasive scrubbers on tough stains When a stain won't budge, reaching for a magic eraser or a scrubbing pad feels like a logical next step. They do remove the stain, but they also strip the wear layer in patches that show up as permanent dull spots afterward. A slightly damp microfiber pad with your pH-neutral solution, applied with a bit of patience, handles most tough stains without touching the wear layer. 7. Running a beater brush vacuum on bare laminate Your vacuum's beater brush is designed to agitate carpet fibers, but it's not suitable for hard floors. On laminate, it leaves faint scratch lines over time that are most visible in high-traffic areas near doors and the kitchen. You can switch to a soft brush roll setting, or use a vacuum designed for hard floors to keep your surface scratch-free. The Bottom Line on Cleaning Laminate Floors Laminate floors are more forgiving than most people think, as long as you respect the two things it's sensitive to: moisture and pH. Keep water controlled, use the right cleaner, and your floors will hold up well for years. The right vacuum and mop make both of those things easier to manage consistently. Browse the Dreame wet and dry vacuum collection to see which model fits your home, or take a closer look at the Dreame H15 Pro Heat. It dispenses water in controlled amounts and suctions it back in the same pass, so you get a mop-style clean without the standing water that warps laminate. Frequently Asked Questions How often should you clean laminate floors? You should vacuum or dry sweep daily in high-traffic areas, especially if you have pets. A damp mop with pH-neutral cleaner once a week works well for most homes. Spills should be wiped up immediately, regardless of your regular schedule. Can you mop laminate floors with vinegar? Using vinegar occasionally won't cause immediate damage, but regular use can dull the wear layer over time. A pH-neutral cleaner gets you the same streak-free result without the long-term trade-off. What's the best way to clean very dirty laminate floors? Vacuum thoroughly first, then use a slightly stronger pH-neutral solution on a microfiber pad. Work in sections, rinse with clean water on a fresh pad, and dry immediately. Make sure to avoid anything abrasive or acidic regardless of how dirty the floor is. Can you use a Swiffer on laminate floors? The dry pads work fine for quick dust pickup between proper cleans. The wet pads release more liquid than laminate prefers, so if you use them, make sure that you also dry the floor immediately after each pass to prevent moisture sitting in the seams. How to clean laminate floors without streaks? Spray your cleaner onto the microfiber pad rather than the floor and use a pH-neutral solution. You should also dry each section immediately after mopping. Streaks usually come from the wrong cleaner or moisture that sat too long before drying.
Read full article: How to Clean Laminate Floors: Best Methods, Cleaners, and Tools (2026)




